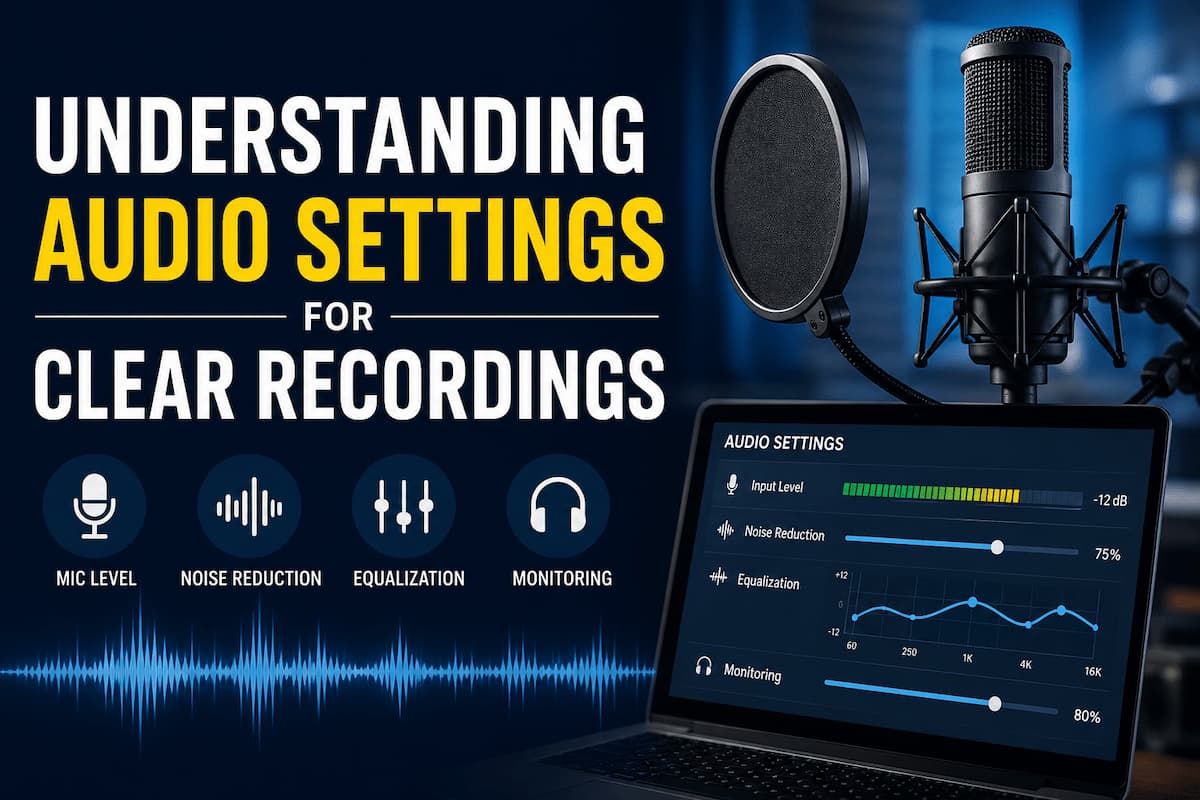
Audio is the most lied-about topic in content creation. Everyone tells you to “get a good mic” as if spending $200 on a Blue Yeti automatically makes you sound like an NPR host. It doesn’t. I’ve heard recordings from $50 USB mics that sounded professional and recordings from $500 XLR setups that sounded like someone shouting into a tin can from the bottom of a well. The difference was never the microphone. It was the person holding it, and more specifically, the settings they never touched.
What follows isn’t a gear guide. You won’t find microphone recommendations here. This is about the invisible stuff—the sample rates, bit depths, gain staging, and compression settings that determine whether your voice sounds like you or like a robot having a rough day. These are the settings I ignored for my first year of recording and the ones that fixed 90% of my audio problems once I finally understood them.
The Sample Rate Myth
Here’s a conversation I’ve had approximately forty times:
Friend: “I’m recording at 96kHz because higher is better, right?”
Me: “What are you doing with the recording?”
Friend: “YouTube. Maybe a podcast.”
Me: “YouTube compresses everything to 48kHz. Podcast platforms downsample to 44.1kHz. Your 96kHz file is getting crushed anyway, and you’re just creating enormous files for no reason.”
Friend: “…oh.”
Sample rate is how many times per second your audio is sampled. More samples = more detail, theoretically. But human hearing is limited to around 20kHz, and the Nyquist theorem states that you must sample at twice your highest frequency to capture it accurately. So 44.1kHz (CD quality) captures everything up to 22.05kHz. 48kHz captures up to 24kHz. Both cover the entire range of human hearing with margin to spare.
96 kHz and 192 kHz exist for specific post-production workflows—pitch shifting, time stretching, and heavy processing where having extra data prevents artifacts. For straight voice recording that goes directly to YouTube or a podcast, is 96kHz or 192kHz necessary? Massive overkill. Your file sizes quadruple. Your CPU works harder. Your hard drive fills up faster. And the final listener hears zero difference.
The practical rule: record at 48 kHz if your final destination is video (YouTube, Twitch, etc.). Record at 44.1 kHz if your final destination is audio-only (podcast, music). Match your project sample rate to your delivery sample rate. Anything else will create problems that you’ll have to fix later with unnecessary conversion.
🎙️ What I Learned the Hard Way
I recorded six months of podcast episodes at 192kHz because I read online that “pros use high sample rates.” Each 30-minute episode was a 3GB WAV file. My cloud storage bill was ridiculous. My editing software lagged. And when I finally uploaded to Spotify, they converted everything to 44.1kHz MP3 at 128kbps. All that “extra quality” vanished into the platform’s compression algorithm. I now record at 48kHz for everything. Files are manageable. Editing is smooth. Listeners hear zero difference. The end.
Bit Depth: Why 24-Bit Actually Matters
Unlike sample rate, bit depth is worth caring about. It’s the dynamic range of your recording—how quiet something can be before it gets lost in digital noise and how loud something can be before it clips and distorts.
16-bit (CD quality) gives you about 96dB of dynamic range. That’s a lot. For reference, a whisper is about 30 dB, and a jet engine is about 140 dB. 96 dB covers most real-world situations. But here’s the catch: you would rather not record at the edge of that range. You want headroom. Room to breathe. Room for unexpected loud moments.
24-bit gives you about 144dB of dynamic range. That’s absurdly more than any microphone or preamp can actually deliver (microphone self-noise and preamp noise floor limit real-world dynamic range to around 120dB on excellent gear). So why record 24-bit if you’ll never use all that range?
Because it lets you record quieter. You don’t need to push your levels as high to stay above the noise floor. You can peak at -12dB instead of -6dB or -3dB. That headroom means sudden laughs, dropped microphones, or unexpected loud noises don’t clip. Clipping is digital distortion. It’s irreversible. It ruins takes. 24-bit is insurance against clipping, and it’s free—modern interfaces and DAWs handle 24-bit easily.
My workflow: record at 24-bit/48kHz. Peak around -12dB to -18dB. Never worry about clipping. Normalize or compress in post to bring the levels up. Sleep soundly knowing I didn’t destroy a perfect take with one unexpected loud syllable.
Gain Staging: The Invisible Skill That Separates Amateurs From Pros
Gain staging is the chain of volume adjustments from your mouth to the final file. Get it wrong at any point, and everything downstream suffers. Most beginners get it wrong at the first point: the microphone preamp.
Here’s the chain as I understand it:
Your voice → Microphone sensitivity → Preamp gain → Interface analog-to-digital conversion → DAW fader → Plugins/effects → Master output → Export
Each stage should be optimized so the next stage receives a healthy signal without distortion. The most common mistake? Cranking the preamp gain to get a “hot” signal, then pulling the DAW fader down to compensate. This is backwards. You’re amplifying noise at the preamp stage and then attenuating everything, including your voice, at the DAW stage. The noise stays amplified. Your signal-to-noise ratio suffers.
Proper gain staging: set your preamp gain so your loudest normal speaking peaks around -12 dB on your interface meters. That’s it. Don’t touch the DAW fader unless you’re mixing multiple tracks. Keep it at unity (0dB). Your signal is clean, your noise floor is low, and you have 12dB of headroom before clipping. That’s the sweet spot.
I spent a year recording with my preamp gain too high and my DAW fader at -10dB to compensate. My recordings had a constant hiss I couldn’t eliminate. I blamed my microphone. Bought a new one. Same hiss. The hiss was from the preamp, not the mic. Lowered preamp gain and raised DAW fader to 0 dB. Hiss vanished. Problem solved for free.
⚡ The Gain Staging Check You Should Run Right Now
Open your recording software. Set your DAW track fader to 0dB (unity). Now speak into the mic at your loudest normal volume while adjusting only the preamp gain knob. Watch the meters. Aim for peaks around -12dB. If you’re hitting -6dB or higher, turn the preamp down. If you’re only hitting -30dB, please turn it up. When you consistently hit -12dB, stop. Don’t touch the DAW fader. Record a test. Listen back. Notice how much cleaner the silence is between your words. That’s proper gain staging. That’s what “pro audio” actually sounds like.
Compression: Your Voice Is Not Consistent (And That’s the Problem)
Human voices are wildly dynamic. You whisper at 40dB. You laugh at 80dB. You shout at 90dB. That’s a 50dB range in normal conversation. Now imagine listening to a podcast where the host whispers and you crank your volume to hear it, then they laugh and blow out your eardrums. Compression fixes these issues.
A compressor reduces the volume of loud sounds and raises the volume of quiet sounds (via makeup gain), narrowing the dynamic range. Everything becomes more consistently audible. The whisper is louder. The shout is quieter. The listener doesn’t touch their volume knob.
But compression is the most abused effect in audio. Slap a compressor on with default settings, and you get the “podcast voice”—overly squashed, unnaturally consistent, and fatiguing to listen to for more than 10 minutes. It sounds like every word is the same volume, which is technically the goal but aesthetically terrible.
My approach: light compression. A ratio of 3:1 or 4:1. A threshold is set so the compressor only engages on the loudest 20% of my speech. A medium attack (10-20 ms) so initial consonants punch through. A medium release (100-200 ms) so the compressor breathes naturally. Makeup gain to bring the overall level up to -16dB LUFS (the standard for podcasts and YouTube).
The result? My whispers are audible. My shouts don’t clip. But there’s still dynamic variation. It still sounds human. That’s the goal. Consistency without sterilization.
| Parameter | What It Does | My Starting Point for Voice |
| Threshold | The volume level where compression starts | -18dB to -24dB (catches loud peaks, ignores normal speech) |
| Ratio | How much compression is applied | 3:1 to 4:1 (moderate, not aggressive) |
| Attack | How fast compression engages after threshold is crossed | 10-20 ms (lets transients through, catches the body of the sound) |
| Release | How fast compression stops after level drops below threshold | 100-200ms (natural decay, doesn’t pump audibly) |
| Makeup Gain | Volume boost to compensate for compression | Enough to hit -16dB LUFS integrated (YouTube/podcast standard) |
EQ: Less Is More, But Less Is Necessary
Equalization shapes your tone. Boost the highs for clarity and “air.” Cut the lows for rumble and mud. Boost the upper mids for presence and intelligibility. Every voice needs different treatment, but there are universal starting points.
The “telephone voice” effect—thin, harsh, no bass—comes from aggressive high-pass filtering. Beginners high-pass everything at 100Hz or higher because they read “remove rumble.” But voices have fundamental frequencies as low as 80Hz. Cut everything below 80Hz and you lose body and warmth. Your voice sounds like it’s coming through a cheap speaker.
My EQ chain for voice:
High-pass filter at 60-80Hz. It removes true rumble (HVAC, desk vibrations, traffic) without affecting vocal fundamentals. Gentle slope, 12dB/octave.
Low-mid cut around 200-300Hz if the voice sounds “boxy” or “muddy.” This is where small rooms and cheap microphones build up resonance. A narrow cut of 2-3dB can often clean things up dramatically. Don’t cut too much or the voice sounds thin.
Presence boost around 3-5kHz. This range is where consonants live. A gentle +2 dB shelf here makes words more intelligible without adding harshness. This is the “podcast clarity” frequency.
Air boost around 10-15 kHz. Optional. Adds brightness and “sheen.” Easy to overdo. I usually skip this step unless the recording sounds dull.
De-esser around 5-8kHz. Not technically EQ, but related. Sibilance (harsh “S” and “T” sounds) lives here. A de-esser is a frequency-specific compressor that only engages on these harsh frequencies. Without it, boosted presence creates painful “ESSSS” sounds. With it, clarity stays comfortable.
I used to EQ aggressively. +6dB here, -8dB there. My voice sounded processed, artificial, and wrong. Now I make tiny adjustments—2 dB cuts, 1 dB boosts—and let the microphone and room do the heavy lifting. The best EQ is the EQ you don’t need because your recording was clean from the start.
🔍 The “Before and After” Test That Changed My Mind
Record a 30-second clip with no processing. Save it. Now apply your usual EQ and compression. Export that. Now apply half as much processing as you think you need. Export that. Listen to all three with fresh ears the next day, not immediately after editing. I guarantee the lightly processed version sounds more natural and more professional than the heavily processed one. Our ears adapt to what we’re working on. Sleep resets them. Trust the morning’s listen. It never lies.
Noise Floor: The Sound of Silence
Every recording has a noise floor—the baseline hiss, hum, or room tone present even when you’re silent. Your goal is to make it inaudible in the final product. Not by cranking noise reduction plugins (which create artifacts and “underwater” sounds), but by recording quietly enough that the noise floor sits far below your voice.
Measure your noise floor: record 10 seconds of silence in your space. Normalize the clip to peak at 0dB. Now look at the average level. That’s your noise floor relative to full scale. If it’s -60dB or lower, you’re in excellent shape. If it’s -40dB, you’ve got problems.
Common noise floor killers and their fixes:
- Computer fans: Move the tower outside the room. Use longer cables. Or build a simple baffle (a cardboard box lined with a towel) around the tower, leaving ventilation gaps.
- Refrigerator hum: Unplug it during recording. Set a phone alarm to plug it back in. I’ve forgotten twice. Lost food once. Worth it for clean audio.
- HVAC/air conditioning: Record during off-hours. Or use a dynamic microphone, which is less sensitive to distant noise than condensers.
- Electrical hum (60 Hz in the US, 50 Hz in the EU): This is a ground loop or poor shielding. Try a different outlet. Try a ground lift adapter (carefully). Try a USB isolator between the interface and computer. Sometimes the fix is as simple as moving a power cable away from an audio cable.
- Room tone/echo: Soft stuff. Rugs. Curtains. Bookshelves. The more surfaces that absorb rather than reflect, the quieter your room sounds.
I obsessed over noise floor for months. Bought a new interface. Bought a new microphone. The hum persisted. Turned out it was my monitor’s power brick, sitting six inches from my audio interface. Moved it two feet away. Humming gone. Total cost: $0. Sometimes the fix is embarrassingly simple if you just look around.
Export Settings: The Final Compression That Matters
You recorded pristine 24-bit/48kHz WAV files. You edited carefully. You applied tasteful processing. Now you need to deliver. And this is where most people destroy their work.
YouTube: Export at -14dB LUFS integrated loudness. YouTube normalizes everything to this level anyway. If you export louder, YouTube turns you down. If you export quietly, YouTube turns you up (and potentially reveals noise you didn’t notice). Match the platform standard and let their algorithm do nothing.
Podcasts: -16 dB LUFS for stereo, -19 dB LUFS for mono. Spotify, Apple Podcasts, and most platforms target these levels. Again, match the standard.
Format: WAV or FLAC for archival. MP3 at 192kbps or higher for delivery. 128kbps is the bare minimum for voice and sounds noticeably degraded on good headphones. 320kbps is overkill for voice—192kbps is the sweet spot of quality vs. file size.
I used to export everything at 320kbps MP3 because “higher is better.” My podcast hosting bill was inflated. Download times were slow for listeners on mobile data. Switched to 192kbps. Nobody complained. File sizes halved. Quality was indistinguishable on 99% of playback devices. Sometimes “good enough” is the professional choice.
✅ The Export Checklist I Use Every Single Time
Before I export any recording, I run through this mental list: Sample rate matches the project (48 kHz for video, 44.1 kHz for audio). Bit depth is 16-bit for delivery (24-bit for archives only). Loudness is measured with an LUFS meter and hits the platform target. No clipping on the master bus. No plugins accidentally bypassed. File name includes the date and version. I once exported a podcast episode with my EQ bypassed—raw, unprocessed audio went live to 10,000 subscribers. Now I check twice. The checklist takes 30 seconds. The embarrassment lasts forever.
Putting It All Together: A Real Workflow
Here’s my actual recording workflow, stripped of theory:
1. Enter the room. Turn off HVAC. Unplug the refrigerator. Close windows. Silence your phone.
2. Set preamp gain while speaking at loudest normal volume. Peak at -12dB. DAW fader at 0dB.
3. Record a 10-second silence test. Listen for unexpected noise. Fix if needed.
4. Record the content. Don’t stop for minor mistakes. Keep flow. Edit later.
5. Edit. Cut mistakes. Arrange segments. Don’t process yet.
6. Apply EQ: high-pass at 70 Hz, cut 250 Hz if muddy, gentle presence boost at 4 kHz, and de-esser.
7. Apply compression: 3:1 ratio, threshold catching top 20% of peaks, 15 ms attack, 150 ms release, and makeup gain to -16 dB LUFS.
8. Listen on three systems: studio monitors, headphones, and phone speaker. If it sounds good on all three, it’s good.
9. Export at platform-appropriate settings. Archive the raw WAV.
10. Sleep on it. Listen fresh in the morning. If something bothers me, I re-export. If not, I publish.
This workflow took two years to refine. Your workflow will be different. The point isn’t to copy mine. It’s to build one intentionally, test it, and iterate. Random settings produce random results. A defined workflow produces consistency. And consistency is what makes listeners trust you.
🚫 The One Setting That Will Ruin Everything
Auto-gain. Auto-level. Auto-anything on your microphone or interface. These features analyze your audio in real-time and adjust gain to “keep levels consistent.” Sounds helpful. Is actually destructive. They pump your noise floor up during silence, creating audible hiss. They slam your gain down during loud moments, creating unnatural dips. They make your voice sound like it’s being controlled by a robot with bad timing. Turn every auto feature off. Set levels manually. Check them before every recording. Your consistency will improve dramatically, paradoxically, by refusing to let a machine handle it for you.
Audio is a craft, not a checklist. These settings are starting points, not gospel. Your voice is different from mine. Your room is different. Your microphone is different. Use your ears. Trust them more than any guide. Record, listen, adjust, repeat. That’s the only path to audio that sounds like you—and that’s the only audio worth publishing.

Riley Bennett writes about content creation, streaming gear, and building efficient creator workflows at estergamer.com. After spending years testing equipment and figuring out what actually works versus what just looks impressive, Riley focuses on practical, no-nonsense advice for beginners starting from scratch. When not writing, Riley enjoys exploring new tech, refining home studio setups, and helping fellow creators skip the expensive mistakes that slow most people down. The goal is simple: honest guidance that gets real results without the marketing fluff.