Your stream looks fine. That’s the problem. “Fine” doesn’t keep viewers. “Fine” gets scrolled past. If you want people to stick around, hit follow, and actually come back tomorrow, you need quality that punches above your experience level. The good news? Most streaming quality issues have nothing to do with expensive gear and everything to do with settings most beginners never touch.
I’ve sat through enough pixelated slideshows, ear-bleed audio disasters, and streams that buffered every 30 seconds to know what separates the watchable from the unwatchable. And I’ve been the person causing those disasters. These are the fixes that actually moved the needle for me—no fluff, no gear worship, just practical changes you can make tonight.
Bitrate: The One Setting That Fixes Half Your Problems
Bitrate is how much data your stream pushes per second. Too low? Blocky, blurry mess. Too high? Your internet chokes, viewers buffer, everyone leaves. Most beginners set this wrong and never look back.
Here’s the sweet spot based on what you’re actually streaming:
| Resolution | FPS | Recommended Bitrate | Upload Speed Needed |
| 720p | 30 | 2,500 – 3,500 kbps | 5+ Mbps |
| 720p | 60 | 3,500 – 4,500 kbps | 7+ Mbps |
| 1080p | 30 | 4,000 – 5,500 kbps | 8+ Mbps |
| 1080p | 60 | 5,500 – 7,000 kbps | 10+ Mbps |
Most beginners should start at 720p30. It looks crisp on phones and laptops (where 80% of viewers watch), it’s forgiving on lower-end hardware, and it won’t murder your internet. I streamed at 1080p60 for months because I thought “more is better.” My stream dropped frames constantly. Viewers complained about buffering. Dropped to 720p60 and my average watch time doubled. Quality perceived is more important than resolution number.
💡 What I Learned the Hard Way
I spent weeks convinced my stream looked bad because my camera was cheap. Bought a $400 webcam. Looked identical. The real culprit? I was streaming at 1080p with a bitrate of 2,500 kbps—nowhere near enough data to make 1080p look good. The pixels were being compressed into mush. A $50 webcam at the right bitrate looks better than a $400 webcam at the wrong bitrate. Every time.
Encoder Settings: x264 vs. NVENC vs. QuickSync
This is where streams live or die, and most beginners pick randomly because the names sound like sci-fi weapons.
x264 uses your CPU to encode the stream. It produces the best quality per bit of data. It also turns your processor into a space heater and can cause game stuttering if your CPU isn’t beefy. I used x264 on a 4-core processor. My game dropped to 30 FPS. Never again.
NVENC uses NVIDIA graphics cards to encode. Slightly lower quality than x264 at the same bitrate, but it offloads work from your CPU. If you have a GTX 1650 or better, use this. Your games will run smoother. Your stream will look 95% as good. That’s the tradeoff worth making.
QuickSync uses Intel integrated graphics. Surprisingly decent for newer Intel chips (8th gen and up). Often overlooked because “integrated graphics” sounds weak. Don’t sleep on it if you have a modern Intel CPU and no dedicated GPU.
My rule: have a dedicated NVIDIA card? NVENC. No dedicated GPU but modern Intel? QuickSync. Only use x264 if you have a 6+ core CPU and you’re not playing CPU-intensive games. Test all three. Stream for 10 minutes with each. Check your in-game FPS and your stream quality. The winner is obvious.
Audio: The Real Reason People Leave
Viewers forgive bad video. They do not forgive bad audio. A pixelated stream with clear audio gets watched. A crisp 4K stream with echoey, distorted, or unbalanced audio gets closed in 10 seconds. Audio is the trust signal. If you sound professional, viewers assume you are professional.
Three audio killers and how to murder them:
1. Echo and room reverb
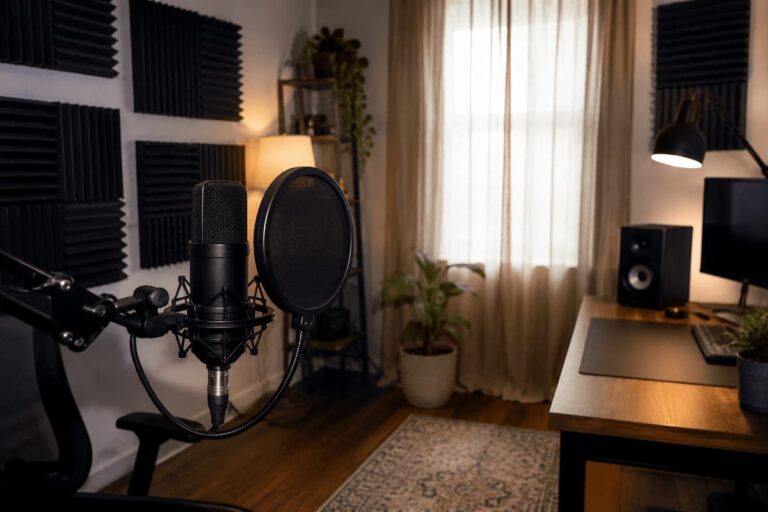
Your voice bounces off walls, ceiling, and hard surfaces, then hits the mic a split second after your direct voice. The result? You sound like you’re broadcasting from a cave. Fix: put soft stuff in your space. A rug. A blanket behind you. A towel under your keyboard. Even a full bookshelf behind your mic helps. You don’t need acoustic panels. You need absorption.
2. Mic too far from your mouth
Most beginners place their mic on the desk, 2 feet away, and crank the gain to compensate. Now every keyboard click, mouse movement, and breath is amplified. The fix is distance, not gain. Get the mic 6-8 inches from your mouth. Use a boom arm if needed. Turn the gain down. Your voice will be clear. Everything else will fade.
3. Game audio drowning you out
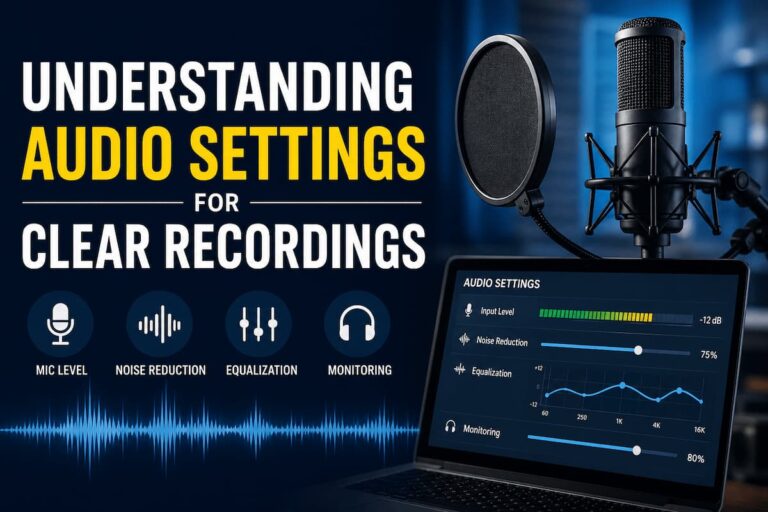
Your game explosions are at -6dB. Your voice is at -18dB. Viewers can’t hear you over the chaos. In OBS or your streaming software, set your mic audio to peak around -12dB. Set game audio to peak around -25dB. Music? -30dB or lower. Your voice should be the loudest thing in the mix. Always.
⚠️ Audio Check You Should Run Before Every Stream
Open your streaming software. Start a test recording. Speak at normal volume for 30 seconds. Play your game at normal volume for 30 seconds. Stop recording. Put on headphones. Play it back. Can you clearly understand every word you said? Is the game too loud during explosions? Is there hiss or hum you didn’t notice while recording? Fix it now. Not after 50 viewers have already heard the mess.
Lighting: Cheap, Fast, Effective
You don’t need a ring light. You don’t need softboxes. You need one decent light source in front of you and nothing bright behind you.
Window light is free and often perfect. Face the window. Not next to it. Not with it behind you. Face it. If you stream at night, a single desk lamp with a white t-shirt draped over it becomes a diffused light source. Sounds ridiculous. Works shockingly well. The t-shirt spreads the light so it’s not a harsh spotlight on one side of your face.
What kills streams is backlighting. A bright window behind you? Your camera exposes for the window. You become a silhouette. A lamp behind your monitor shining toward the camera? Same problem. Turn off or dim everything behind you. Light your face. Darken your background. Simple.
Frame Rate vs. Resolution: The Choice That Matters
60 FPS looks smoother. 30 FPS looks cinematic. For fast-paced games (FPS, racing, fighting games), 60 FPS is worth the bitrate cost. Viewers need to track motion. For slower games (RPGs, strategy, visual novels), 30 FPS is fine. Save the bitrate for better image quality instead of smoother motion nobody cares about.
I streamed Stardew Valley at 60 FPS for months. Waste of bitrate. Switched to 30 FPS, used the saved bandwidth for higher quality settings, and the farm looked noticeably sharper. Nobody commented on the frame rate. Multiple people said the game “looked cleaner.”
Internet Stability: More Important Than Speed
You need 5+ Mbps upload minimum. But speed isn’t the whole story. Stability matters more. A connection that bounces between 20 Mbps and 2 Mbps will destroy your stream even if the average is fine. Consistency is king.
Wired ethernet beats WiFi every time. I fought dropped frames for weeks on a “fast” WiFi connection. Plugged in an ethernet cable. Problem vanished. If you can’t run a cable, a powerline adapter (uses your home’s electrical wiring) is the next best thing. Not as good as ethernet. Better than WiFi.
Close bandwidth hogs before streaming. Netflix on the TV in the next room. Cloud backups running. Family members downloading games. Your stream needs priority. Either ask for bandwidth courtesy or set QoS (Quality of Service) on your router to prioritize your streaming PC.
✅ Quick Pre-Stream Checklist
Run a speed test. Upload should be at least double your target bitrate. Check OBS stats—dropped frames should be 0%. Test record for 60 seconds and review. Close all non-essential programs. Put phone on silent. Have water within reach. Check that your mic isn’t muted (yes, I’ve streamed muted). You’re ready.
FAQs:
Why does my stream look great on my monitor but terrible on my phone?
Your monitor is large and forgiving. A phone screen is small and unforgiving. Compression artifacts that disappear on a 27-inch monitor are glaring on a 6-inch screen. Also, mobile viewers often watch on lower bandwidth, so the platform serves them a lower-quality version of your stream. Nothing you can do except ensure your source quality is as clean as possible.
Should I stream in 1080p even if I only have 720p worth of bitrate?
No. Never. 720p at 4,000 kbps looks dramatically better than 1080p at 4,000 kbps. The pixels are starved for data at 1080p. They look muddy, blocky, and worse than a lower resolution with adequate bitrate. Resolution is a number. Quality is what viewers actually see.
My stream drops frames but my internet is fast. What’s wrong?
Probably your CPU or GPU is overloaded. Open Task Manager (Ctrl+Shift+Esc) while streaming. If CPU or GPU is pegged at 95%+, that’s your bottleneck. Lower your game settings, switch to hardware encoding (NVENC/QuickSync), or reduce your output resolution. Fast internet can’t save an overloaded processor.
Do I need a second monitor to stream?
No, but it helps. You can manage everything on one screen. It’s just cramped. I streamed for a year on a single monitor. Used my phone for chat. Worked fine. A second monitor is quality of life, not quality of stream.
Why does my stream lag behind real-time by 10+ seconds?
That’s normal. Most platforms add 5-15 seconds of delay for buffering and transcoding. Twitch is usually 5-10 seconds. YouTube can be 10-20. Nothing is wrong with your setup. It’s just how live streaming works. Don’t try to “fix” it—you’ll break something else.
Should I use a capture card if I’m streaming PC games?
No. Capture cards are for console streaming or dual-PC setups. For single-PC gaming, capture cards add unnecessary complexity and potential latency. Stream directly from your PC using software capture.
🚫 The “Quality” Trap to Avoid
Chasing perfect stream quality is a rabbit hole with no bottom. I know streamers with $10,000 setups who obsess over 1% quality improvements while their content is boring. Meanwhile, creators with basic gear and genuine energy build audiences. Stream quality gets viewers in the door. Your personality, consistency, and content keep them. Optimize until it’s “good enough,” then focus on what you’re actually saying. A “good enough” stream with great energy beats a “perfect” stream with none.
Platform-Specific Quirks You Should Know
Each platform handles your stream differently after it leaves your PC. Knowing these quirks prevents confusion.
Twitch transcodes your stream into multiple quality options for viewers, but only if you’re a Partner or Affiliate with transcode enabled. If you’re neither, viewers get whatever you upload. A viewer on mobile data trying to watch your 6,000 kbps 1080p stream? They can’t. They’ll buffer and leave. Start conservative on Twitch until you have transcodes.
YouTube transcodes for everyone. Upload whatever quality you want. YouTube handles the rest. This is why YouTube is more forgiving for beginners pushing higher bitrates.
Facebook Gaming has lower bitrate limits than the others. Pushing too high can cause issues. Stick to 4,000 kbps max until you know your specific situation works.
TikTok LIVE is mobile-first and compressed aggressively. Overkill quality settings are wasted here. Focus on lighting and audio. The platform will crush your video quality anyway.
When to Actually Upgrade Your Gear
Upgrade when your current setup is the clear bottleneck for a specific, measurable problem. Not because you want to. Because you need to.
Signs it’s actually time:
- Your mic picks up room noise no matter what you try, and a dynamic mic would solve it
- Your camera can’t handle your lighting and produces constant grain/noise
- Your CPU is maxed and you can’t switch to hardware encoding
- Your stream is consistently good but you want to add a second camera angle
- Your current webcam can’t focus close enough for product demos or hand movements
Signs it’s NOT time:
- You saw a cool setup on Reddit
- You feel like your growth is stalled and blame your gear
- A new version of something you own came out
- You have money burning a hole in your pocket
I’ve bought gear for all the wrong reasons. The purchases I don’t regret? The ones that solved a problem I could describe in one sentence.
🎯 The Bottom Line
Better streaming quality isn’t about having the best gear. It’s about making the gear you have work correctly. The right bitrate. The right encoder. The right audio balance. The right lighting position. These are free or cheap adjustments that outperform expensive upgrades done wrong. Fix your settings before you fix your wallet. Your viewers—and your bank account—will thank you.

Riley Bennett writes about content creation, streaming gear, and building efficient creator workflows at estergamer.com. After spending years testing equipment and figuring out what actually works versus what just looks impressive, Riley focuses on practical, no-nonsense advice for beginners starting from scratch. When not writing, Riley enjoys exploring new tech, refining home studio setups, and helping fellow creators skip the expensive mistakes that slow most people down. The goal is simple: honest guidance that gets real results without the marketing fluff.