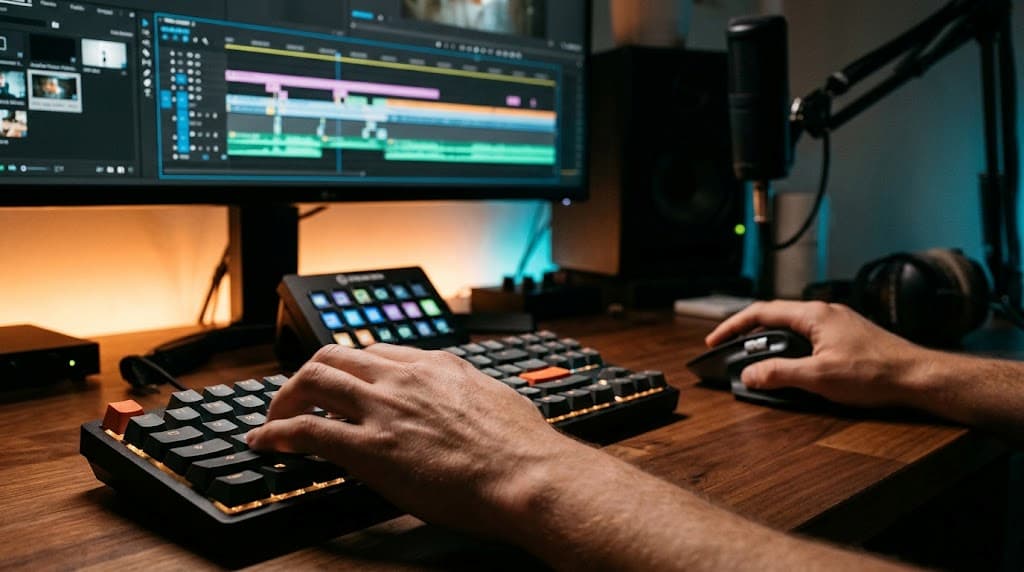
If you film a 20-minute talking-head video, the raw footage is likely full of mistakes, retakes, deep breaths, and awkward pauses. When I first started creating content, removing that “dead air” was a painfully slow process.
I would physically drag my mouse over to the toolbar, click the Razor tool, drag the mouse back to the timeline, click to make a cut before the mistake, click to make a cut after the mistake, drag the mouse back to the toolbar to grab the Selection tool, click the bad clip, press the Delete key on the far right side of my keyboard, click the empty gap that was left behind, and press Delete again to snap the remaining clips together.
That single, simple edit took about six seconds. In a standard YouTube video, you might make that exact edit 400 times. That is over forty minutes of purely wasted, repetitive mechanical motion. It is no wonder so many new creators experience massive burnout—and eventually carpal tunnel syndrome—during post-production.
True editing speed is unlocked when you stop relying on your mouse for every action and start trusting your keyboard. By mastering dynamic trimming, remapping your default keys, and introducing physical macro pads into your workflow, you can literally cut your editing time in half. Here is the exact setup I use to tear through massive timelines without breaking a sweat.
The “Left-Hand Anchor” Philosophy
Before we discuss specific shortcuts, you have to fundamentally change how you sit at your desk. Fast editors do not move their hands very much.
The core philosophy of speed editing is the “Left-Hand Anchor.” Your right hand should almost never leave your mouse. Its only job is to scrub through the timeline and select specific assets. Your left hand should be permanently anchored to the left side of your keyboard, with your fingers resting on the Q, W, E, and R keys, just like a competitive PC gamer.
If you have to lift your left hand and reach across the keyboard to press “Backspace” or “Enter,” you are losing time. Every essential command you need to cut a video must be remapped to the left side of your keyboard.
The Holy Trinity of Cutting: Q, W, and C
If you are using Adobe Premiere Pro or DaVinci Resolve, the greatest time-saving tools ever invented are already built into your software. They are called Ripple Trimming shortcuts.
Let’s go back to the scenario of cutting out a mistake. Instead of using the mouse to manually slice, delete, and close gaps, you only need two buttons: Q and W.
-
Pressing ‘Q’ (Ripple Trim Previous to Playhead): This instantly deletes everything on the clip from where your playhead currently is, backward to the previous cut, and then magnetically snaps the entire timeline to the left to close the gap.
-
Pressing ‘W’ (Ripple Trim Next to Playhead): This deletes everything from where your playhead is, forward to the next cut, and snaps the timeline shut.
The Workflow: You are playing your footage. You hear yourself stumble over a word. You press C (which should be mapped to the Razor/Add Edit tool) to make a cut right when the mistake starts. You let the video keep playing until you say the word correctly. You press Q.
Instantly, the mistake is deleted, the gap is closed, and your video continues playing seamlessly. A six-second mouse process just became a half-second keystroke. This one trick alone will save you hours every single week.
High-Speed Playback: J, K, and L
Watching your raw footage in real-time (1x speed) is a massive waste of time. If you have an hour of raw gaming footage or podcast audio, it shouldn’t take you an hour to review it. You need to use the Shuttle Controls: J, K, and L.
-
L plays the footage forward. Press it twice, and it plays at 2x speed. Press it three times, and it plays at 4x speed.
-
K pauses the footage.
-
J plays the footage in reverse. Double-tap it to rewind quickly.
Holding K and tapping L will inch your video forward exactly one frame at a time, allowing you to find the exact millisecond a loud noise or a visual cue happens. Once your brain gets used to listening to your own voice at 2x speed, you will be able to review and slice a 60-minute recording in just 30 minutes.
Breaking the Defaults: Essential Key Remaps
Out of the box, video editing software assigns shortcuts based on the first letter of the tool (e.g., ‘Z’ for Zoom, ‘P’ for Pen). This makes sense logically, but it is terrible for ergonomics. You must aggressively remap your software’s default keys to keep everything under your left hand.
Here are the four custom remaps you should execute immediately in your software’s keyboard preferences:
-
Delete/Backspace -> ‘X’ or ‘Z’: Reaching up to the top right of your keyboard to delete a clip ruins your flow. Map your primary delete function to a key right under your left thumb or ring finger.
-
Zoom In / Zoom Out -> ‘1’ and ‘2’: By default, zooming into your timeline often requires holding Alt and scrolling the mouse wheel, or pressing the ‘+’ and ‘-‘ keys near the numpad. Map Zoom Out to the ‘1’ key and Zoom In to the ‘2’ key. You can now aggressively punch in and out of your timeline with your left ring and middle fingers.
-
Toggle Full Screen -> ‘`’ (Tilde key): Constantly making your video preview full-screen to check focus or color, and then minimizing it to see your timeline, is tedious. The tilde key (next to the 1 key) is the perfect toggle switch for instant full-screen review.
The Macro Revolution: Hardware Automation
Once you have mastered keyboard shortcuts, you will realize that some repetitive tasks require four or five sequential clicks, and there is no single keyboard shortcut to do them all. This is where hardware macros come in.
A macro is a single button press that executes a pre-recorded sequence of actions instantly. To do this, professionals use a macro pad, the most popular being the Elgato Stream Deck or the Loupedeck Live.
While these devices are heavily marketed toward Twitch streamers for switching scenes, they are actually the most powerful video editing tools money can buy.
Real-World Editing Macros You Can Build: Using the Stream Deck software, you can program “Multi-Actions.” Here are a few examples of how I use my Stream Deck to cheat time:
-
The “Punch-In” Macro: In talking-head videos, you often want to digitally zoom in on your face to emphasize a point. I have a single button on my Stream Deck labeled “Punch In.” When I press it, the software automatically cuts the clip, scales the video to 120%, repositions the Y-axis so my eyes stay in frame, and changes the label color of the clip to orange so I can see it on the timeline. One button press replaces seven mouse clicks.
-
The “Audio Fix” Macro: When I drop raw microphone audio onto the timeline, I have to apply an EQ, a compressor, a hard limiter, and normalize the peaks. I created a macro that instantly selects the audio track, applies my custom preset chain, and sets the audio gain to -3dB.
-
The “Export for YouTube” Macro: When the video is done, one button press saves the project, opens the export window, selects my specific 4K YouTube bitrate preset, names the file, and hits render.
Upgrading the Mouse (The Final Polish)
If you are using a standard, $10 generic office mouse to edit video, you are handicapping yourself. A dedicated productivity mouse—like the Logitech MX Master 3S or a gaming mouse like the Razer Naga—is essential because of one feature: extra physical buttons.
The MX Master 3S features a horizontal thumb wheel. In editing, you spend half your time scrolling left and right across your timeline. Using a standard mouse, you have to click the tiny grey scrollbar at the bottom of the screen and drag it. With a thumb wheel, you simply flick your thumb to fly across a 30-minute timeline in seconds.
Furthermore, you can map the programmable side buttons on your mouse to your most used modifiers. I map my front side-button to “Undo” (Ctrl+Z) and my back side-button to “Redo” (Ctrl+Shift+Z). If I make a bad cut, I don’t even have to look at the keyboard; I just squeeze my thumb and the mistake vanishes.
Building Muscle Memory
Reading about keyboard shortcuts is easy; forcing yourself to use them is incredibly difficult.
If you try to implement all of these changes today, your next editing session will actually be slower because you will have to stop and think about every button press. Your muscle memory will fight you.
Do not try to learn everything at once. Pick three shortcuts (I highly recommend starting with Q, W, and C). Write them on a sticky note and put it on the bottom bezel of your monitor. Force yourself to use only those three keys instead of your mouse for an entire project. It will feel frustrating for the first hour, but by day two, your fingers will fly across the board automatically. Once those three are locked into your muscle memory, pick three more.
Post-production does not have to be a grind. By treating your keyboard like a musical instrument rather than a typewriter, you can reclaim hours of your life, protect your wrists from repetitive strain, and get your content published significantly faster.

Riley Bennett writes about content creation, streaming gear, and building efficient creator workflows at estergamer.com. After spending years testing equipment and figuring out what actually works versus what just looks impressive, Riley focuses on practical, no-nonsense advice for beginners starting from scratch. When not writing, Riley enjoys exploring new tech, refining home studio setups, and helping fellow creators skip the expensive mistakes that slow most people down. The goal is simple: honest guidance that gets real results without the marketing fluff.