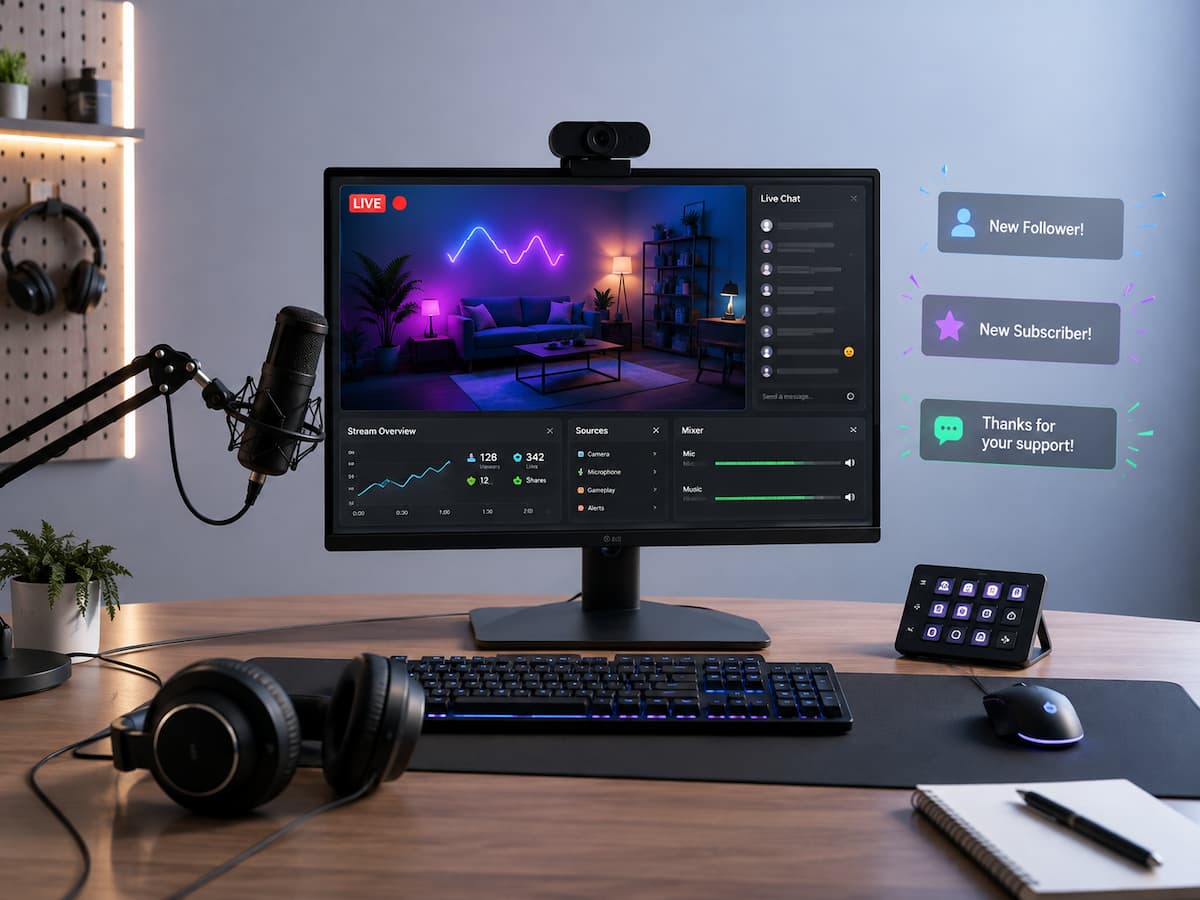
What Are Alerts in Streams?
Stream alerts are on-screen or auditory notifications that pop up when something specific happens during a live stream. Depending on the platform you’re using and the tools you have, when someone follows, subscribes, sends support, lives a membership, raids a channel, or does another supported action, an alert may pop up. The alert usually has an animation, an image, a message, and a sound.
The key idea is that a user activity is associated with the live video. Instead of something happening in the background, the audience may see that the presenter has seen it. For example, Twitch uses alerts to showcase community activity, such as followers and subscriptions. Twitch also has event systems that can inform applications when things like new followers, subscriptions, cheers, or Channel Point redemptions occur.
Alerts are not the same as the platform’s own notification system that alerts a viewer when a creator goes live. Stream alert is part of the broadcast experience. It is something the audience can see or hear while viewing. Don’t regard an alert as a decoration, but as a small dialog between the viewer and the broadcast.
The Importance of Stream Alerts in a Live Stream
Live video differs from recorded footage because the audience can influence what happens during the broadcast. That engagement is a big part of the appeal of live content. A good alert makes that interaction happen without asking the streamer to stop what they are doing.
Think of a game feed. A new viewer comes in during a heated match. The streamer may not have time to read the whole chat, but a brief alert can recognize the follow. A subscription alert is a natural pause for a quick thank you throughout a creative stream. A poll or viewer-triggered event during a community discussion can help convert passive observers to participants.
Alerts can also provide important visual indications to the streamer. Instead of constantly watching a dashboard, the broadcast itself can be a signal that an event needs attention. Restraint is the word. If every little thing becomes a big animation with loud sound, then essential things lose their meaning fast. So the finest warnings have three qualities: they are obvious, they are short, and they are relevant. They should complement the content, not take away from it.
The Main Types of Stream Alerts
The exact events available depend on the platform and the alert service you use. Some services support a wide range of events, while platform-native tools may provide their own interaction features.
| Alert Type | Typical Purpose | Good Use |
|---|---|---|
| Follow alert | Welcome a new follower. | Short greeting and visual acknowledgment |
| Subscription or membership alert | Acknowledge recurring support. | Personal thank-you or community message |
| Support or tip alert | Recognize viewer support. | Brief animation with a readable message |
| Raid alert | Welcome viewers arriving from another channel. | Welcome message and quick introduction |
| Milestone alert | Celebrate a community achievement. | Special animation used occasionally |
| Custom event alert | React to a specific interaction | Channel-specific games, challenges, or rewards |
You do not need every available alert. A small channel may only need follow-up, subscription, and support alerts. A more interactive channel might add raids, redemptions, or custom events. Starting with a small set makes testing and maintenance much easier.
Choosing Alerts That Fit Your Stream
The right alert system depends more on your content than on how many features a streaming service offers. A quiet educational broadcast needs a different approach from a lively gaming stream. If your content requires concentration, large animations can interrupt the information you are explaining. If your broadcast is highly energetic, a little more movement may fit naturally.
Match the alert to the moment.
Consider what you want the viewer to feel when an alert appears. A new follower might receive a simple welcome. A major community milestone might deserve something more noticeable. A custom event can be playful if the event itself is part of the entertainment. It is also useful to create different alert levels. Not every event needs the same animation, sound, or duration. This prevents routine alerts from becoming distracting while giving genuinely important community moments more visual weight.
How Stream Alerts Work Behind the Scenes
A typical alert system has three basic parts: an event, an alert service or platform connection, and a display inside your broadcasting software. When the relevant event occurs, the service receives or recognizes it. The service then generates the alert content. Your broadcasting software displays that content as part of the scene.
In OBS Studio, one common method is a browser source. OBS describes Browser Source as a web browser that can be added directly to a scene, allowing web-based layouts, video, audio, and other content to appear in the broadcast. This is why many alert services provide a widget URL that can be placed into a browser source. The process can therefore look simple: viewer action → alert service → widget → browser source → broadcast. If something fails, identifying which part of this chain has stopped working makes troubleshooting easier.
Some platforms and services also offer direct integrations or plugins. Twitch provides developer event systems that can deliver notifications for supported channel events. You do not need to understand programming to use ordinary alert tools, but knowing the basic flow helps explain why account connections, browser sources, permissions, or network problems can affect alerts.
How to Set Up Stream Alerts
The exact buttons vary between services, but the overall setup process is similar. Streamlabs, for example, provides an Alert Box that can be customized and added to OBS or other compatible streaming software. Its current documentation also recommends testing alerts before going live.
- Choose the platform where you broadcast and connect your account to an alert service or use the platform’s available alert tools.
- Select the events you would like to display. Start with two or three important events rather than enabling everything.
- Customize the alert’s message, image or animation, sound, font, and duration.
- Generate or locate the widget source supplied by the service.
- Open your broadcasting software and add the alert widget as a supported source, such as a browser source in OBS.
- Place the alert in an area that does not cover important video, captions, or chat.
- Use the service’s test function and watch the result in your broadcasting software’s preview.
- Run a complete test before starting the actual broadcast.
Do not assume that seeing an alert in a dashboard preview means viewers will see it correctly on the stream. A preview can test the design, while a real test event checks whether the widget is actually reaching your broadcasting software.
Warning: Never wait until the middle of a live broadcast to discover that your alert source is hidden, muted, incorrectly sized, or connected to the wrong account.
Designing Alerts Without Distracting Viewers
Good alert design is less about being spectacular and more about being easy to understand. The viewer should be able to recognize what happened within a second or two. Large text, excessive motion, long animations, or loud sound effects can make an alert harder to process. Keep the message short. “Welcome, Alex!” is usually easier to read than a paragraph. Choose a font that remains readable against your stream background. If your game or camera feed contains lots of movement, consider using a consistent background or outline around alert text.
Sound deserves the same attention. An alert sound should be audible enough for the streamer to notice, but it should not overpower speech or gameplay. Test the alert while speaking at your normal microphone volume. If the sound makes you pause or lose your place, it is probably too aggressive. Duration matters too. A notification that remains on screen for ten seconds may block important content. A short animation is usually easier to integrate into a busy broadcast.
| Design Element | Beginner-Friendly Approach | What to Avoid |
|---|---|---|
| Text | Short and readable | Long paragraphs |
| Animation | Brief movement | Constant flashing |
| Sound | Clear and moderate | Sudden loud effects |
| Position | Open area of the scene | Over important gameplay or captions |
Using Alerts to Encourage Interaction
An alert becomes more useful when it leads naturally into something the streamer can do. For example, a new follower alert can prompt a quick greeting. A raid alert can lead to a welcome message explaining what is happening. A custom event can trigger a small challenge or change in the broadcast.
The important distinction is between acknowledging participation and pressuring people to participate. Viewers should not feel that every interaction is a demand for another action. A healthy broadcast gives people several ways to take part, including simply watching and chatting.
Platform-native interaction tools can also work alongside alerts. YouTube Live Chat supports real-time conversations, polls, Q&A, and reactions. These tools can create interaction without requiring every event to produce a large visual notification. A useful approach is to combine one visual alert with one conversational response. The alert provides the acknowledgment; the streamer provides the human interaction.
Moderation and Viewer Safety
Alerts can display viewer names and sometimes viewer-submitted text. That creates a moderation concern that is easy for beginners to overlook. A malicious or inappropriate message can become part of the broadcast if an alert system displays user input automatically.
Use profanity filters or moderation controls when available, and avoid enabling unrestricted text-to-speech until you understand exactly how the system handles viewer input. You should also know how to pause or disable alerts quickly if something inappropriate appears.
Moderation should extend beyond alerts. YouTube provides live chat moderation tools that allow creators and moderators to manage conversations and protect the community. Similar moderation features exist across major live platforms. Treat every automated viewer-facing feature as something that needs a safety check before you put it on a public broadcast.
Troubleshooting Stream Alerts
When an alert does not appear, avoid changing multiple settings at once. Check the system step by step.
| Problem | What to Check First |
|---|---|
| No visual alert | Verify that the source is visible and correctly layered. |
| The alert appears but has no sound. | Check source volume, audio routing, and mute settings. |
| Test works but real events do not | Verify account connections and enabled event types. |
| The alert is cut off. | Review source dimensions and alert duration. |
| The old design appears. | Refresh the browser source or cached widget. |
| The alert appears in the wrong scene. | Check which scene contains the alert source. |
OBS Browser Source settings can be refreshed when needed, and alert providers may have their own troubleshooting controls. Streamlabs, for example, recommends checking audio settings, source visibility, browser-source behavior, alert variations, moderation delays, and cached content when widgets fail.
If the problem continues, please test the alert outside of the live broadcast. A private or controlled test allows you time to inspect the source without putting viewers through repeated failed notifications.
Maintaining Your Alert System
Alerts are easy to forget once they work. That can become a problem after you change scenes, update streaming software, switch accounts, redesign your broadcast, or replace a microphone. A quick test before important streams can prevent avoidable problems.
- Test important alerts regularly.
- Check that alert sources still exist in every scene where they are needed.
- Review audio levels after changing your microphone or mixer.
- Remove alerts that no longer match your content.
- Review moderation and text-to-speech settings.
- Keep your streaming software and relevant integrations maintained.
It is also worth reviewing your alert library occasionally. If an animation that once felt exciting now feels repetitive, simplify it. Your broadcast will usually benefit more from a few reliable alerts than from a large collection that you rarely use.
Common Stream Alert Mistakes
One of the most common mistakes is treating alerts as a competition for attention. A live broadcast already contains video, voice, gameplay, chat, music, and other visual elements. Adding huge animations to every event can make the screen difficult to follow. Another mistake is using identical alert behavior for every event. If a routine follow and a major community milestone receive the same giant animation, the audience has no visual clue about which moments are more significant.
Ignoring accessibility is another overlooked issue. Some viewers may have difficulty processing rapid flashing or sudden loud sounds. Keeping alerts readable and reasonably restrained makes the broadcast more comfortable for a wider audience. Finally, many beginners fail to test alerts using the actual stream layout. An alert may look perfect in a design dashboard but cover a face camera, important game information, subtitles, or other overlays once it is placed into the final scene.
A Simple Beginner Alert Workflow
If you are starting from scratch, keep the first version simple. Choose one platform, one broadcasting application, and a small alert set. Set up the basic events, add the widget to your main scene, and test each event individually.
- Decide which viewer actions deserve an on-screen acknowledgment.
- Create a consistent visual style for those alerts.
- Use short messages and moderate sounds.
- Add the alert widget to your broadcasting software.
- Test every enabled event.
- Check the alert while speaking and while your normal content is moving on screen.
- Ask whether the alert helps the broadcast or simply adds noise.
- Make adjustments before using the system during a public stream.
Once the basic system is reliable, you can experiment with custom events, variations, community challenges, or platform-native interaction features. Building gradually is easier than creating a complicated alert system and then trying to discover which part is causing problems.
Conclusion
FAQs
1. What are the most significant alerts for a newbie?
Concentrate on what matters most to your community. That can be followed by subscriptions or memberships and support events for many newcomers. Custom viewer interactions and raids can be added later if you want to add them to your channel. You don’t need to turn on all the alerts you can. During a live broadcast it is generally easier to test, manage, and understand a smaller system.
2. Why does my alert work on the dashboard but not on OBS?
A glimpse of your dashboard doesn’t mean the widget is actually working inside your broadcasting program. Make sure you added the relevant widget source, that the source is visible, that it is above other sources when needed, and that the widget URL or integration is correct. Also see if you need to refresh the browser source. Part of the setup is testing from within the actual streaming scene.
3. How long do stream alerts need to be on screen?
There is no standard length, but alerts should generally be on screen long enough to be understood without interrupting the broadcast for too long. A small message with a simple animation can vanish rapidly. A more thorough notification could take longer. Test the duration while you are speaking and while the main material is moving. If the message is not reaching the audience, make it slightly longer; if the alert keeps interrupting the material, shorten it.
4. Are stream alerts for anything other than contributions or subscriptions?
Yes. Alerts can be set to react to the following: raids, cheers, memberships, redemptions, milestones, and other supported events, depending on the platform and integration. Some broadcasters employ special events for games, challenges, or community activities. The available options differ; therefore, consult the latest documentation for your platform and alert service, rather than assuming every event is supported everywhere.
5. Do we want every alert to have a sound?
No, not at all. Sound can help make a warning noteworthy, but if you use music for every event, it can rapidly become tiresome. “Consider selective use of sound or maintaining routine alerts silently. The volume should also be below a level that interferes with speech or crucial broadcast audio. Always test the alarm when your microphone and other normal audio sources are on, because something that sounds decent when heard by itself can be too loud in the finished mix.
6. Are automatic alerts with viewer messages secure?
They can be useful, but viewer-produced text needs moderation. An alert that auto-displays a username or message could broadcast inappropriate content. Utilize any accessible filters, moderation controls, and text-to-speech protections. Don’t think that an automated system will understand every harmful or undesired communication. You also need to know how to rapidly disable notifications if an issue arises during a live session.

Riley Bennett writes about content creation, streaming gear, and building efficient creator workflows at estergamer.com. After spending years testing equipment and figuring out what actually works versus what just looks impressive, Riley focuses on practical, no-nonsense advice for beginners starting from scratch. When not writing, Riley enjoys exploring new tech, refining home studio setups, and helping fellow creators skip the expensive mistakes that slow most people down. The goal is simple: honest guidance that gets real results without the marketing fluff.