I was three minutes into what I thought was the perfect take when I heard it. Not my voice. Not the script. A low, persistent hum that made the entire recording sound like it was coming from inside a washing machine. I hadn’t noticed it while recording. My brain had tuned it out years ago. But the microphone? The microphone heard everything. It always does.
That’s the cruel truth about background noise. Your ears are incredible noise-canceling machines. They filter out the refrigerator, the traffic, and the electrical hum from your monitor. Microphones don’t filter. They faithfully capture every stupid sound in your room, then play it back with perfect clarity while you sit there wondering why your “professional” recording sounds like it was made in a bus station.
Over two years of recording in apartments with thin walls, shared spaces, and neighbors who apparently practice tap dancing at midnight, I’ve developed a noise-hunting system. It starts with identification. You can’t fix what you haven’t named. And most background noise falls into one of five categories, each requiring a completely different assassination technique.
The Low-Frequency Monsters
This is the noise that doesn’t sound like noise until you try to remove it. HVAC systems. Footsteps from upstairs. Traffic rumble. Air conditioning. These live in the 20-200 Hz range, which is brutal because male voices’ fundamentals start around 85 Hz. You can’t just EQ it out without turning your voice into a telephone call from 1987.
I recorded an entire audiobook chapter before realizing my apartment building’s heating system cycled on every 12 minutes. A low whoosh that sat directly under my vocal range. I tried noise reduction software. It mangled my voice. I tried EQ. It made me sound like I was speaking through a pillow. The only fix was stopping the noise at the source.
Here’s my hit list for low-frequency killers:
- Turn off the HVAC during recording. Yes, you’ll be slightly uncomfortable. Yes, it’s worth it. Set a phone alarm so you remember to turn it back on.
- Move your desk away from exterior walls. Traffic rumble travels through the structure. Being three feet from the wall versus six feet makes a surprising difference.
- Put a thick rug under your recording area. Not a thin decorative rug. A dense, shaggy, actual-fiber rug. It absorbs footfall vibration and low-end reflection.
- Use a shock mount for your microphone. Desk vibration from typing, shifting weight, or downstairs neighbors walking travels up your stand and into the mic. A shock mount isolates the capsule from mechanical vibration. It’s not optional if you type while recording.
💡 What I Learned the Hard Way
I once spent $180 on a “professional” noise reduction plugin to eliminate the rumble from my neighbor’s washing machine. The plugin worked. It also removed all the low-end warmth from my voice, making me sound like I was broadcasting from a tin can. The actual fix? I asked my neighbor when they usually did laundry and stopped recording on Tuesday and Thursday evenings. Total cost: $0. Relationship with neighbor: slightly improved because I brought them cookies while asking. Sometimes the best audio solution is a conversation, not a purchase.
The Electronic Hiss
This is the high-frequency enemy. Computer fans. Graphics card coil whine. Cheap USB power supplies. Preamp noise from cranking gain too high. It lives between 2kHz and 8kHz, which is exactly where vocal clarity and sibilance live. Software noise reduction can target it, but aggressive removal creates that weird “underwater” artifact where words sound like they’re being swallowed.
The thing about electronic hiss is that it’s usually your fault, not your gear’s fault. I chased hiss for months, convinced my microphone was defective. I bought a new interface. New cables. New mic. The hiss followed me like a curse. The real culprit? I was recording at 30% input gain and boosting everything in post, which boosted the preamp noise floor along with my voice. Proper gain staging (which I only learned after embarrassing myself on a forum) put the hiss 40dB below my voice, making it effectively inaudible.
Electronic hiss elimination checklist:
- Move your computer tower outside the room. Run USB and HDMI cables through the door. If that’s impossible, put the tower on the floor as far from the mic as possible, and point the exhaust fans away from the recording position.
- Turn off your monitor’s speakers. Even muted, some monitors emit a faint high-frequency whine from their power supply that microphones pick up.
- Unplug unnecessary electronics. Phone chargers, LED strip controllers, and external hard drives all add a tiny bit of electrical noise. Each one adds a tiny bit of electrical noise. Together, they add up.
- Check your sample rate and buffer size mismatches. Sometimes digital artifacts masquerade as hiss. Match your interface sample rate to your DAW sample rate. Mismatches create crackle and noise that sounds like static.
⚠️ The Hiss Test You Should Run Tonight
Unplug your microphone from the interface. Record 10 seconds of silence with the input gain set exactly where you normally record. Now plug the mic back in and record another 10 seconds in your normal position, but don’t speak. Compare the two files. If the silent-with-mic file is significantly noisier than the no-mic file, your mic or cable is picking up interference. If they’re equally noisy, your preamp or interface is the problem. If the no-mic file is clean and the with-mic file is noisy only when you move, you have a cable shielding issue. This 30-second test saves you from buying gear you don’t need.
The 60Hz Ghost
If you live in North America and hear a steady, musical hum in your recordings, that’s 60Hz electrical interference. In Europe or Asia, it’s 50Hz. It sounds like someone holding a low note on a synthesizer forever. It’s ground loops. It’s poor cable shielding. It’s power supplies leaking into your audio chain. It’s the most annoying noise because it’s constant, predictable, and absolutely ruins professional recordings.
I had a ground loop for six months that I couldn’t trace. It only happened when my laptop was plugged in. On battery? Clean. Plugged in? Hum. The laptop charger was creating a ground loop through the USB cable to my interface. A $15 USB isolator—a small box that breaks the electrical connection between devices while keeping the data connection—fixed it instantly. I had been planning to buy a new laptop.
Ground loop and hum fixes, ranked by cost and invasiveness:
| Fix | When to Use It | Cost |
| Different outlet | Hum appears when multiple devices share a power strip. Plug interface and computer into separate wall outlets on different circuits. | Free |
| Ferrite cores | Clamp-on noise suppressors for USB and audio cables. Kills high-frequency interference traveling along cable shields. | $5-15 |
| USB isolator | Laptop charger hum and ground loops between computer and interface. Breaks the electrical ground connection. | $15-40 |
| Balanced cables | Using XLR instead of unbalanced 1/4″ or 3.5mm cables. Canceled interference via phase inversion. Requires balanced inputs/outputs. | $10-30 |
| Ground lift adapter | Last resort for persistent ground loops. Lifts the ground pin on one device. Use with caution—can create safety issues if not done carefully. | $5-10 |
🔌 The Ground Loop Detective Method
Start with everything connected and the hum present. Unplug devices one at a time from your audio chain. Computer. Monitor. External hard drive. Phone charger. LED desk lamp. When the hum disappears, the last thing you unplugged is the culprit or part of the loop. Once identified, try plugging that device into a different outlet. If the hum persists, that device needs a ferrite core or isolation. If unplugging everything doesn’t stop the hum, your wall wiring itself may be the issue, and no amount of gear will fix it. You’ll need an electrician or a different room.
The Human Transients
These are the noises that don’t show up in every recording. They’re random. Unpredictable. Infuriating. A door slamming. A phone notification. Your own stomach is growling because you skipped lunch. A dog barking three houses down. The UPS truck that only comes at the exact moment you start recording.
I have a recording of a podcast intro where, perfectly timed with my opening sentence, a motorcycle revved its engine outside my window. I couldn’t recreate that timing if I tried. It was operatic in its bad luck. These noises can’t be fixed in post without replacing the entire take. Prevention is the only strategy.
My pre-recording ritual for transient noise:
- Put a sign on the door. “Recording until 3 PM. Do not knock unless there is fire.” Housemates learn to respect the sign. Delivery drivers do not. That’s what the second sign is for.
- Phone goes in another room. Not on silent. Not face-down. Another room. Vibrations travel through desks. Screen lights reflect in glasses. Notifications break your focus even if you don’t hear them.
- Close windows. Obvious, but I forget half the time. Street noise is the easiest noise to block and the most common one I leave unblocked.
- Don’t record hungry. Stomach growls are surprisingly loud on sensitive condenser microphones. Eat a light snack 30 minutes before. Not a heavy meal—you’ll get sleepy.
- Check the laundry schedule. Washing machines spin. Dryers rumble. Both are low-frequency nightmares that pass through walls. I record on weekends when the building laundry room is empty.
- Notify housemates. A text 10 minutes before: “Going live/recording for 1 hour.” Most people are accommodating if they know. Nobody is accommodating if you surprise them with demands for silence.
✅ The “Silent Room” Checklist
Before you hit record, sit in absolute silence for 60 seconds. Close your eyes. Listen. What do you hear? The refrigerator? The clock ticking? Your computer fan? A distant highway? Your own breathing? Write it down. Now decide which ones you can eliminate, which you can reduce, and which you’ll have to live with. That 60-second audit prevents the heartbreak of discovering noise after you’ve delivered the perfect performance. I do this before every important recording. It takes one minute. It has saved me hours of re-recording.
The Room Itself
This is the noise source most beginners miss because it doesn’t sound like noise. It sounds like your voice. But wrong. Hollow. Echoey. Like you’re in a bathroom even though you’re in a bedroom. This is room tone—reflections of your voice bouncing off walls, ceiling, and floor, then hitting the microphone microseconds after the direct sound. It smears clarity. It makes you sound amateur regardless of how expensive your microphone is.
I recorded in an empty spare bedroom for months. Looked clean on camera. Sounded like a parking garage. Every “S” and “T” had a little ghost trailing behind it. I bought acoustic foam. Covered two walls. Still sounded bad. The problem was the hardwood floor and the bare ceiling. Sound was bouncing up and down, completely untreated, while I obsessed about the walls.
Room tone fixes that actually work:
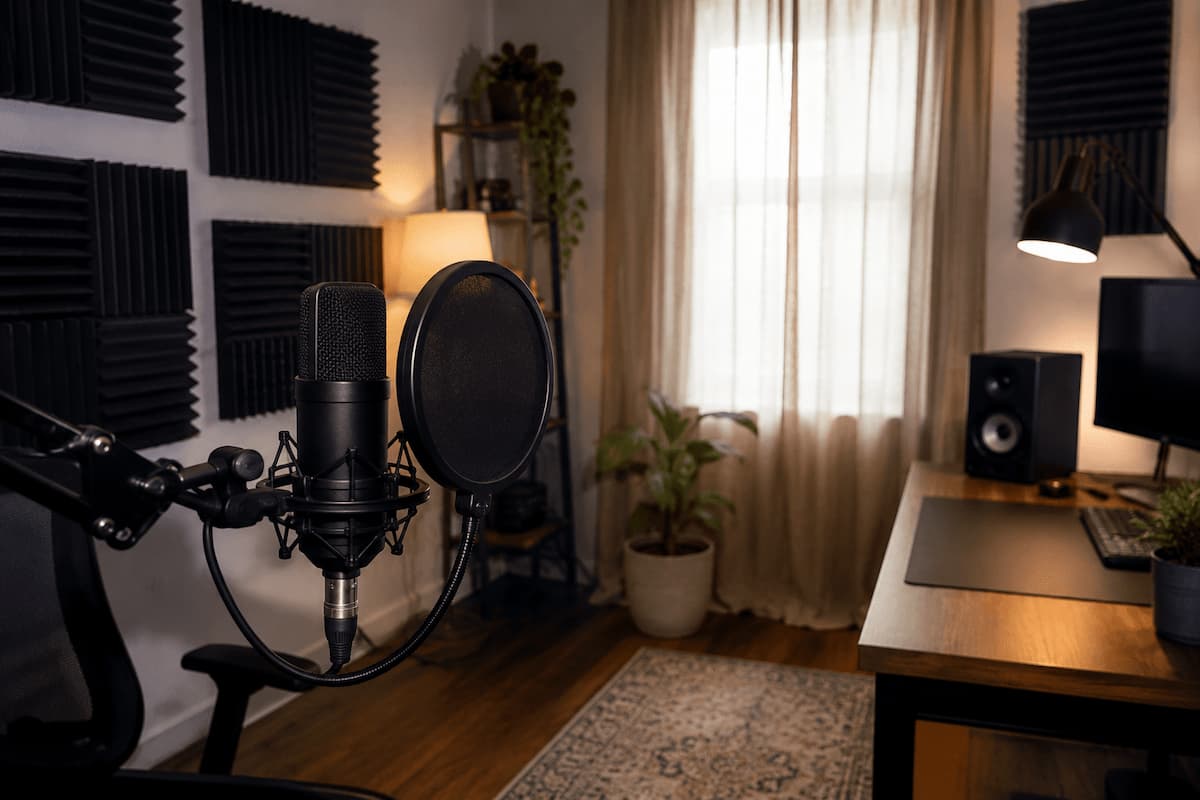
- Rug on the floor. Non-negotiable. Hard floors reflect sound straight up into your microphone. A thick rug under your recording position is the single biggest improvement you can make for under $100.
- Blanket behind you. Hang a heavy comforter or moving blanket on the wall directly behind your mic. This stops the “slapback” echo that makes your voice sound hollow. Command hooks. No damage. Takes five minutes.
- Bookshelf to the side. A full bookshelf is an incredible diffusor. It breaks up sound reflections and adds natural absorption. Plus it looks good on camera.
- Ceiling treatment if possible. This is the hardest surface to treat. A cloud panel hung above your recording position helps, but it’s often impractical. If you can’t reach the ceiling, record in a smaller space where ceiling height matters less. A walk-in closet with clothes is often better than a large empty room with foam.
🚫 The Foam Panel Trap
I bought 50 square feet of acoustic foam and covered every wall in a grid pattern. I looked like I was living in a padded cell. And it sounded dead. Not good-dead. Lifeless, dead. My voice had no air, no presence, no life. Acoustic foam only absorbs high frequencies. It does almost nothing for low-end reflection. And too much of it creates an unnatural, sterile environment. You need a balance of absorption and reflection. A room that’s too dead is as bad as a room that’s too alive. Use foam sparingly—first reflection points only. Use thick, soft materials (blankets, curtains, and clothes) for the heavy lifting. Your voice—and your wallet—will thank you.
When Software Is Your Only Friend
Sometimes you can’t eliminate the noise. You live on a busy street. Your apartment has paper walls. Your neighbor has a newborn. In these cases, software noise reduction is your last line of defense. But it is a defense of last resort, not a first option. Every noise reduction algorithm removes a little bit of your voice along with the noise. The trick is removing the noise while keeping the voice intact.
I use noise reduction in three stages, from gentle to aggressive:
Stage 1: Profile-based noise reduction. Record 5-10 seconds of silence in your space. Let the software learn the noise “fingerprint.” Apply 3-6dB of reduction. This is invisible. Audible noise drops. Voice stays untouched. This handles constant hum, hiss, and room tone.
Stage 2: Spectral editing. For isolated noises—a cough, a door slam, a notification beep—use a spectral editor to surgically remove the frequency content at that exact moment. Time-consuming. Precise. Doesn’t affect the surrounding audio. I use this for maybe 3-4 sounds per recording session.
Stage 3: Aggressive gating and expansion. A noise gate closes the audio when you’re not speaking, silencing background noise during pauses. Set the threshold carefully. Too high, and it cuts off the beginning and end of your words (the “tail” of a word is often quieter than the middle). Too low, and it never engages. I set my gate to close about 200ms after I stop speaking, with a gentle fade rather than a hard cut. This sounds natural while killing obvious noise during silence.
⚡ The Noise Reduction Rule of Thirds
For every noise problem, spend your effort in this ratio: one-third fixing the environment, one-third improving your technique and placement, one-third using software. Beginners reverse this. They spend 90% of their effort on software fixes and 10% on the actual source. That’s backwards. Software should be the polish, not the foundation. A clean recording with no processing always sounds better than a noisy recording with aggressive processing. Move the mic closer. Turn off the fridge. Hang a blanket. Then, and only then, open your noise reduction plugin.
Noise is the enemy you can’t see. It hides in plain sight, masked by your brain’s own filtering, waiting to ruin your best work. But it’s not unbeatable. Start with the environment. Fix the electrical issues. Treat your room. Position your mic properly. Use software as a safety net, not a crutch. The goal isn’t a sterile, dead-silent recording. It’s a recording where the only thing the listener hears is your voice, clear and present, without distractions.
Your microphone will always hear more than you do. Make sure what it’s hearing is worth keeping.

Riley Bennett writes about content creation, streaming gear, and building efficient creator workflows at estergamer.com. After spending years testing equipment and figuring out what actually works versus what just looks impressive, Riley focuses on practical, no-nonsense advice for beginners starting from scratch. When not writing, Riley enjoys exploring new tech, refining home studio setups, and helping fellow creators skip the expensive mistakes that slow most people down. The goal is simple: honest guidance that gets real results without the marketing fluff.