If you have ever recorded a video and wondered why your footage looks grainy, flat, or oddly colored, the culprit is almost always lighting. After spending years experimenting with everything from desk lamps to professional LED panels, I can tell you that great video lighting is not about buying the most expensive gear. It is about understanding what your camera needs and choosing equipment that fits your space, budget, and creative goals. This guide breaks down everything you need to know to select lighting equipment that delivers crisp, clear, and visually appealing videos every time.
Why Lighting Matters More Than Your Camera
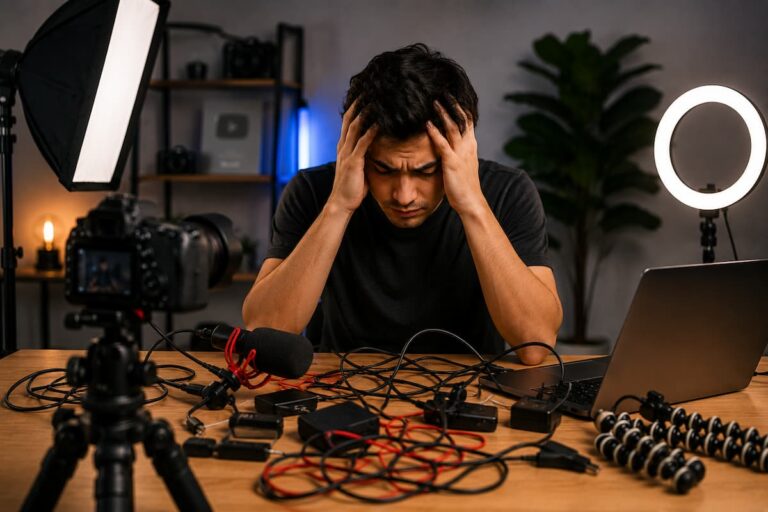
Here is a truth that surprises most beginners: a $300 camera with excellent lighting will produce better video than a $3,000 camera in a dimly lit room. Cameras need light to capture detail. When light is insufficient, the camera boosts its ISO, which introduces noise, reduces sharpness, and makes colors look muddy. I learned these lessons the hard way during my first YouTube attempts. I was shooting with a decent mirrorless camera, but my only light source was a single overhead bulb. The result? I ended up with shadows under my eyes, a yellowish cast on my skin, and footage that looked like it was shot on a phone from 2010.
Good lighting does three critical things for your video:
- Increases clarity and sharpness by giving the sensor enough light to work with at low ISO settings.
- Creates depth and dimension by separating your subject from the background and adding visual interest.
- Sets the mood and tone of your content, whether you want a warm, inviting feel or a cool, professional look.
Before you even think about which light to buy, understand that lighting is the foundation of video quality. Everything else, camera, lens, and microphone, builds on top of it.
Understanding the Three-Point Lighting Setup
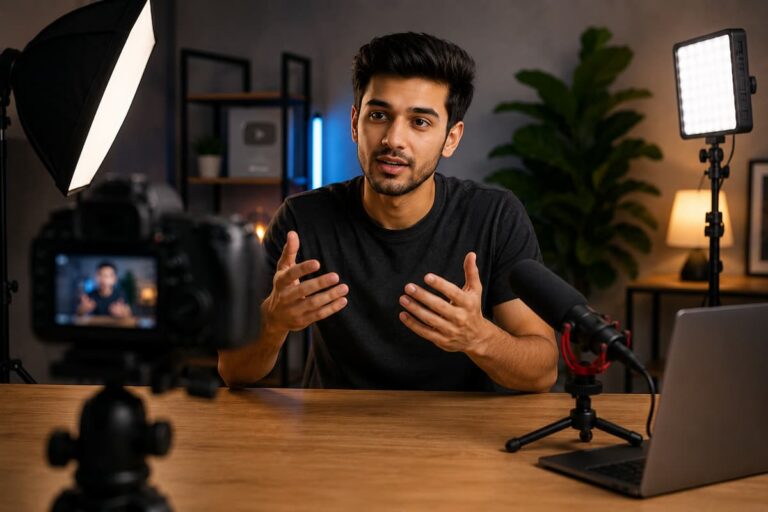
The three-point lighting system is the industry standard for a reason. It works for interviews, vlogs, product reviews, and almost any talking-head video. When I set up my first home studio, I started with this framework and adapted it over time. Here is how it breaks down:
Key Light
This is your main light source and the brightest of the three. It defines the shape and texture of your subject. Place it at roughly a 45-degree angle to one side of the camera and slightly above eye level. If you only have a budget for one light, make it a good key light. I started with a single LED panel as my key light, and it immediately transformed my footage from amateur to acceptable.
Fill Light
The fill light softens the shadows created by the key light. It should be less intense, about half the brightness of the key light. You can place it on the opposite side of the camera at a similar angle. In my early setup, I actually used a white foam board as a reflector instead of a second light. It bounced light back onto my face and cost me under $5. Do not underestimate simple solutions.
Back Light (or Rim Light)
This light sits behind your subject and creates a subtle edge or halo effect that separates you from the background. It prevents the flat, “floating head” look that happens when you and your background are equally lit. Even a small desk lamp positioned behind you can serve as a basic back light. When I added a back light to my setup, viewers immediately commented that my videos looked more professional, even though I had not changed anything else.
| Light Type | Position | Purpose | Budget Tip |
|---|---|---|---|
| Key Light | 45° to the side, above eye level | Main illumination and shape | Invest here first |
| Fill Light | Opposite side of key, lower intensity | Reduce harsh shadows | Use a reflector if needed |
| Back Light | Behind subject, aimed at back of head/shoulders | Create separation from the background. | Even a small lamp works |
Types of Video Lighting Equipment Explained
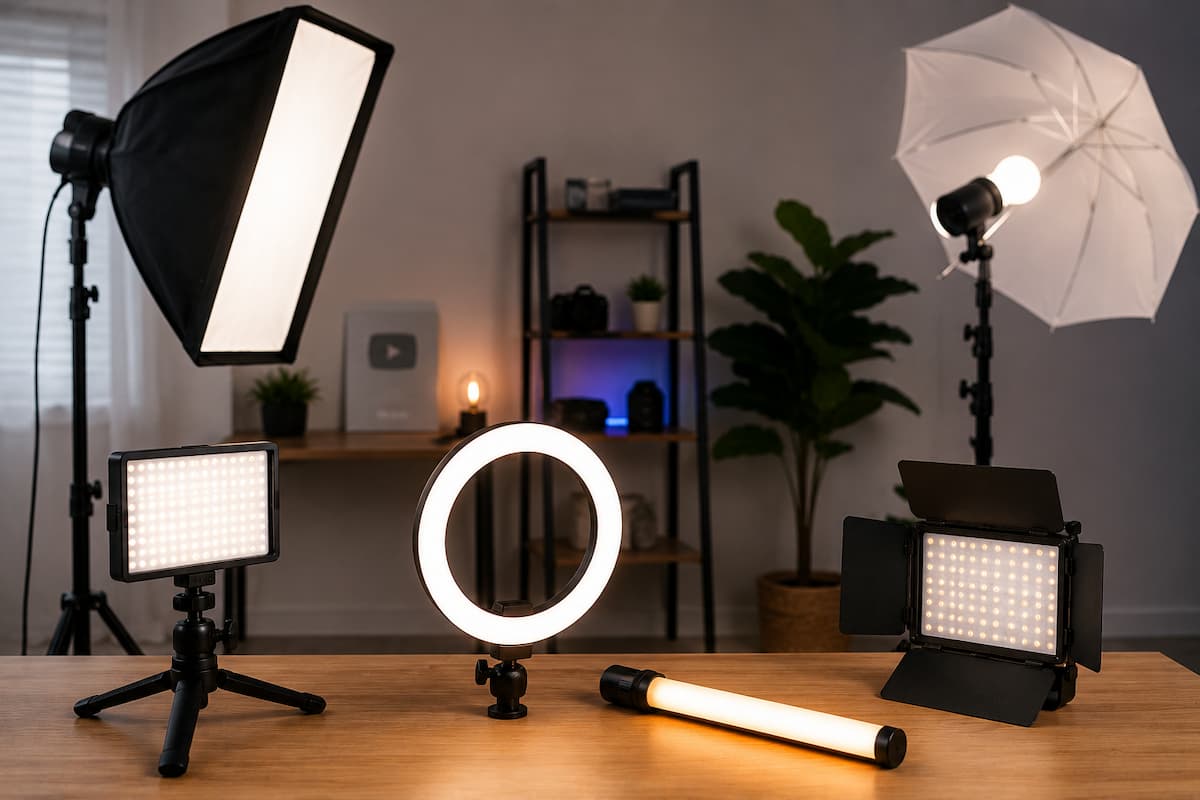
When you start shopping for lights, you will encounter a confusing array of options. Let me simplify the main categories based on what I have used and tested over the years.
LED Panels
LED panels are the most versatile option for video creators today. They are energy-efficient, produce very little heat, and most models offer adjustable brightness and color temperature. I use LED panels for 90% of my shoots because they are reliable and easy to control. Look for panels that offer bi-color capability, meaning you can switch between warm and cool tones. This matters because the color of your room’s ambient light changes throughout the day, and you want to match your lights to avoid mixed color temperatures.
Softboxes
Softboxes diffuse light through a white fabric cover, creating a broad, soft source that wraps around your subject. They are excellent for eliminating harsh shadows and creating a flattering look, especially for face-focused content like beauty tutorials or interviews. The trade-off is that they take up more space and are less portable. I keep a softbox setup in my permanent studio space because the quality of light is unmatched for close-up shots.
Ring Lights
Ring lights are circular lights that you position directly in front of your subject, usually around the camera lens. They create an even, shadowless look and a distinctive circular catchlight in the eyes. They are popular among beauty creators and streamers for good reason. However, they can make your footage look flat if used as the only light source. I use a ring light occasionally for quick social media clips, but I pair it with a back light to maintain some dimension.
Tube Lights and Light Wands
These are long, cylindrical LED lights that have become popular for creative and cinematic looks. They are great for adding colored accents, lighting backgrounds, or creating interesting reflections. I use tube lights to add a splash of color to my background wall, which makes my setup look more dynamic without distracting from the subject. They are not essential for beginners, but they are a fun upgrade once you master the basics.
Natural Light
Do not ignore the sun. A large window with diffused daylight can be one of the best light sources available, and it is free. The challenge is consistency. Clouds move, the sun shifts, and your footage can change color from one minute to the next. I once recorded a 20-minute tutorial by a window, and the first half looked warm while the second half turned cool and blue. If you use natural light, record in short bursts and white balance your camera for each clip.
Color Temperature and Why It Confuses Everyone
Color temperature is measured in Kelvin (K), and it describes whether a light appears warm (yellowish) or cool (bluish). Here is the practical breakdown:
- 2700K to 3200K: Warm white, similar to incandescent bulbs. Good for cozy, intimate settings.
- 4000K to 5000K: Neutral white. A safe middle ground for most content.
- 5600K to 6500K: Daylight balanced. Matches outdoor light and most office environments.
The biggest mistake I see beginners make is mixing color temperatures. If your room has warm overhead bulbs at 2700K and you add a daylight LED at 5600K, your skin will look half-orange and half-blue. It is nearly impossible to fix in editing. Before buying any light, check the color temperature of your existing bulbs and choose lights that match or can be adjusted to match.
Bi-color LED panels solve this problem by letting you dial in any temperature between warm and cool. I always recommend bi-color over single-temperature lights because they give you flexibility as your environment changes.
CRI and TLCI: The Hidden Specs That Matter
Color Rendering Index (CRI) and Television Lighting Consistency Index (TLCI) tell you how accurately a light reproduces colors. A CRI of 90 or above is considered good for video work. A CRI of 95 or above is excellent. Cheap lights often have a CRI in the 70s or low 80s, which means skin tones look unnatural, reds appear orange, and greens look muddy.
I once bought a budget LED panel with a CRI of 82 because it was half the price of a better model. I regretted it immediately. My skin looked sickly, and I had to spend hours in color correction trying to fix footage that never looked quite right. I eventually replaced it with a light rated CRI 96, and the difference was night and day. The footage was vibrant and true-to-life straight out of the camera.
TLC I is a newer standard specifically designed for video and is arguably more accurate than CRI for camera sensors. Look for TLCI values above 90 when available. Not all manufacturers list TLCI, but if you see it, treat it as a strong indicator of quality.
| Rating | CRI Value | Quality for Video |
|---|---|---|
| Poor | Below 80 | Avoid for video work |
| Acceptable | 80 to 89 | Usable but may need color correction |
| Good | 90 to 94 | Reliable for most content |
| Excellent | 95 and above | Ideal for professional results |
Power Output and Brightness: How Much Do You Actually Need?
Light brightness is usually measured in lumens, but for video work, you will also see lux at a specific distance. Lux tells you how much light falls on a subject one meter away from the source. For a typical talking-head video, you want your key light to deliver around 1,000 to 2,000 lux at your subject’s face.
However, raw power is not the whole story. A 5,000-lumen light with a narrow beam will look different from a 5,000-lumen light with a wide beam. Distance matters too. The farther your light is from the subject, the less intense it appears. I learned to position my key light about 3 to 4 feet away from my face for the best balance of brightness and softness.
Dimming capability is essential. You rarely want your light at 100% power. Being able to dial it down to 20% or 50% gives you precise control over contrast and mood. I use dimming constantly to match my lights to the ambient light in the room, especially during golden hour when natural light is pouring in.
Modifiers and Accessories That Elevate Your Setup
The light itself is only half the equation. Modifiers shape and control that light. Here are the accessories I use regularly and why they matter:
Diffusers
A diffuser is a translucent material placed in front of your light to spread it out and soften shadows. Many LED panels come with snap-on diffusers. If yours does not, you can improvise with a white shower curtain or parchment paper. I have done this in a pinch, and it works surprisingly well. Soft light is flattering light, especially for faces.
Barn Doors and Grids
Barn doors are flaps attached to the light that let you direct the beam precisely where you want it. Grids (also called honeycombs) narrow the beam even further. I use barn doors on my backlight to prevent it from spilling onto my face and creating unwanted highlights. They are also useful for lighting backgrounds without light creeping onto the subject.
Light Stands and C-Stands
A shaky light stand is a safety hazard and a frustration. Invest in sturdy stands that can hold your heaviest light without wobbling. C-stands are the industry standard for holding modifiers, flags, and even lights themselves. They are heavy and bulky, but they do not tip over. I learned this lesson when a cheap stand collapsed mid-shoot and my LED panel hit the floor. The light survived, but my heart did not.
Color Gels
Gels are colored sheets that you place over lights to change their color. They are useful for creative effects, correcting mismatched color temperatures, or adding visual interest to a background. I use blue gels on my backlight sometimes to create a cool rim effect that contrasts with the warm key light on my face. It adds depth without requiring extra equipment.
Building Your Lighting Kit on a Budget
You do not need to spend thousands to get started. Here is how I would build a lighting kit from scratch at three different budget levels:
Starter Kit (Under $100)
- Use a large window as your key light during the day.
- Buy a $10 white foam board from a craft store as a reflector for fill.
- Use a desk lamp with a daylight bulb as a back light.
- Total cost: under $20 if you already own the lamp.
This is exactly how I started. It is limiting because you are tied to daylight hours and weather, but it teaches you the fundamentals of light placement and shadow control.
Intermediate Kit ($100 to $300)
- One bi-color LED panel with CRI 95+ for your key light.
- A second smaller LED panel or a reflector for fill.
- A small LED light or clamp lamp for back light.
- Basic light stands.
This setup gives you full control over your lighting regardless of the time of day. I used a kit like this for over a year and produced content that looked professional enough for client work.
Advanced Kit ($300 to $800)
- Two large bi-color LED panels or a softbox kit.
- One dedicated backlight with barn doors.
- Tube lights or RGB panels for background accents.
- Heavy-duty stands, diffusers, and gels.
This is where you start to get creative. You can shape light, add color, and create a signature look that makes your videos instantly recognizable.
Common Lighting Mistakes and How to Fix Them
Over the years, I have made every lighting mistake possible. Here are the most common ones and the solutions that worked for me:
Overhead Lighting Only
Room ceilings are the enemy of good video. Overhead lights create deep shadows under the eyes, nose, and chin, making you look tired and older. The fix is simple: turn off the overhead light and use lights positioned at face level or slightly above. Your face will thank you.
Placing Lights Too Close
When a light is too close to your subject, it creates harsh falloff where one side of the face is bright and the other is dark. It also makes the light source appear larger and more distracting in reflections. Move your key light back to about 3 to 4 feet and adjust the power instead of the distance.
Ignoring the Background
A perfectly lit subject in front of a dark, muddy background looks amateur. Your background needs some light too, even if it is subtle. I aim a small light at my background wall or place a tube light behind my desk to create a gentle gradient. It adds depth and makes the frame feel complete.
Mixing Daylight and Tungsten
I mentioned this earlier, but it deserves repeating. If you have warm indoor bulbs and cool daylight coming through a window, your camera will struggle to white balance correctly. Either block the window, replace the bulbs, or use lights that can match whichever source is dominant.
Forgetting to White Balance
Even with perfect lights, your camera needs to know what “white” looks like in your environment. Auto white balance is unreliable because it shifts as you move. Set a custom white balance using a gray card or white sheet of paper before every shoot. It takes 30 seconds and saves hours of editing.
Practical Setup Walkthrough: My Typical Recording Configuration
Let me walk you through my current setup so you can see how these principles come together in practice:
- Position: I sit about 4 feet from my background wall. This distance prevents shadows from falling on the wall behind me.
- Key Light: A bi-color LED panel on a C-stand, positioned at my 2 o’clock (about 45 degrees to the right), 3.5 feet away, at roughly 60% power, set to 5600K.
- Fill Light: A smaller LED panel at my 10 o’clock, about 4 feet away, at 30% power. This is roughly half the intensity of the key light.
- Back Light: A small LED with barn doors behind my left shoulder, aimed at the back of my head and shoulder. It creates a subtle rim that separates me from the background.
- Background Light: A tube light placed on the floor behind my desk, aimed at the wall, set to a soft blue tone at low power.
- Camera Settings: I set my ISO to 400 or lower, aperture to f/4 for adequate depth of field, and shutter speed to 1/50 (since I shoot at 24 fps). The ample light allows these settings without pushing the camera.
This setup took me about 20 minutes to build the first time, and now I can set it up in under 5 minutes. The result is footage that looks clean, dimensional, and consistent across every video I produce.
Final Thoughts
Selecting lighting equipment for clear videos is not about buying the most gear or the most expensive brands. It is about understanding how light behaves, how your camera responds to it, and how to shape it to serve your content. I have seen creators produce stunning videos with a single LED panel and a reflector, and I have seen others struggle with a room full of high-end lights because they did not understand placement.
Start with the basics. Learn the three-point setup. Pay attention to color temperature and CRI. Use modifiers to shape your light. And most importantly, experiment. Move your lights around. Take test footage. Watch it back and ask yourself what looks off. Over time, you will develop an eye for light that no guide can teach. Great lighting does not happen by accident. It happens by intention. Once you make that shift, your videos will never look the same again.
Quick Summary: Key Takeaways
- Lighting matters more than your camera. A well-lit scene with a basic camera beats a poorly lit scene with an expensive one.
- Master the three-point setup: key light, fill light, and back light. This framework works for nearly all talking-head content.
- Choose LED panels for versatility, softboxes for flattering face lighting, and ring lights for even, shadowless looks.
- Match color temperatures across all light sources to avoid unnatural color casts.
- Look for CRI 90+ to ensure accurate color reproduction and natural skin tones.
- Use modifiers like diffusers, barn doors, and reflectors to shape and control your light.
- Start with one quality key light and expand your kit as your skills and budget grow.
- Always set a custom white balance on your camera before recording.
- Light your background to add depth and prevent a flat, amateur look.
- Test, review, and adjust. The best lighting comes from practice and observation, not just equipment.

Riley Bennett writes about content creation, streaming gear, and building efficient creator workflows at estergamer.com. After spending years testing equipment and figuring out what actually works versus what just looks impressive, Riley focuses on practical, no-nonsense advice for beginners starting from scratch. When not writing, Riley enjoys exploring new tech, refining home studio setups, and helping fellow creators skip the expensive mistakes that slow most people down. The goal is simple: honest guidance that gets real results without the marketing fluff.