If you look at the studio setups of top-tier YouTubers and professional streamers, you will usually see the exact same core lighting gear: massive 120-watt or 300-watt continuous COB (Chip on Board) lights housed inside three-foot parabolic softboxes, supported by heavy-duty stainless steel C-stands, and heavily modified with diffusion grids.
When I first started creating content from my cramped apartment bedroom, I blindly tried to replicate that exact Hollywood-style setup. I purchased a budget $100 continuous lighting kit off Amazon that came with two massive 33-inch umbrella softboxes. I excitedly set them up in my 10×10 foot bedroom.
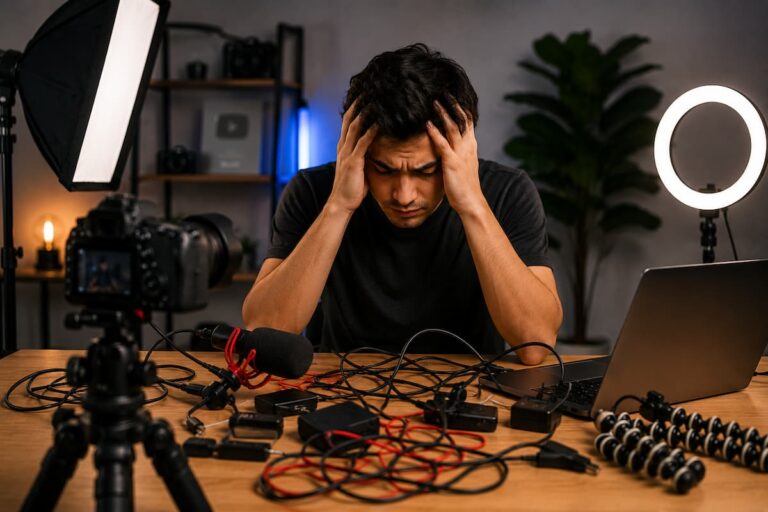
Within twenty minutes of turning them on, the ambient room temperature spiked dramatically. Within an hour, I was sweating on camera, my gaming PC’s cooling fans were screaming at maximum RPM, and I literally could not walk past my own desk without tripping over the massive, sprawling tripod legs. Worse yet, the cheap cooling fans inside the lighting fixtures introduced a constant, high-pitched mechanical whine into my microphone’s audio track that took hours to remove in post-production.
You simply cannot light a tiny bedroom or a closet-sized office the same way a commercial production crew lights a massive warehouse studio. Huge softboxes require massive amounts of floor space, and cheap high-wattage bulbs turn small, closed-door rooms into uncomfortable saunas.
If you are filming in a tight bedroom, a walk-in closet, or a small apartment corner, you have to completely rethink your strategy. You need to maximize the limited physical space you have by bouncing light off surfaces, utilizing smaller-footprint LED panels, and strictly managing ambient heat output. Here is exactly how to build a professional, cinematic lighting setup in the smallest of spaces.
The Physics of Small Spaces: Why “Standard” Lighting Fails
Before we can build a better setup, we need to understand exactly why the traditional “three-point lighting kit” fails so spectacularly in a small residential room.
A softbox works by taking a harsh, direct light source and pushing it through layers of translucent diffusion fabric. To achieve that incredibly soft, flattering, cinematic look on your face—where the shadows roll gently across your cheekbones rather than cutting sharply across your nose—the softbox modifier itself needs to be physically large. The general rule of thumb in cinematography is that the larger the light source is relative to your subject, the softer the light will be.
However, to safely support a heavy 36-inch softbox, you need a heavy-duty light stand. The base of a standard C-stand or a sturdy tripod requires a spread of at least 2.5 to 3 feet of bare floor space to remain stable. If your computer desk is pushed tightly into a corner, or sandwiched between a bed and a wall, you simply do not have three feet of floor space to spare on either side of your monitor.
Furthermore, heat dissipation in small rooms is a massive, often overlooked issue. High-wattage continuous lights generate significant heat from their power bricks (ballasts) and internal cooling fans. If you cram a gaming PC, two monitors, and two 100-watt lights into a bedroom with a closed door (which you must close to block out house noise), the room temperature will rise rapidly. You will be visibly miserable on camera, your makeup will melt, and your energy will completely drain after thirty minutes of recording.
Solution 1: Wall-Bouncing (The Invisible Softbox)
If you physically do not have the square footage for a real softbox, you have to turn the room itself into the softbox. This is a classic technique used by professional documentary cinematographers when shooting in tight hallways or tiny hotel rooms, and it is the single best lighting hack for bedroom content creators.
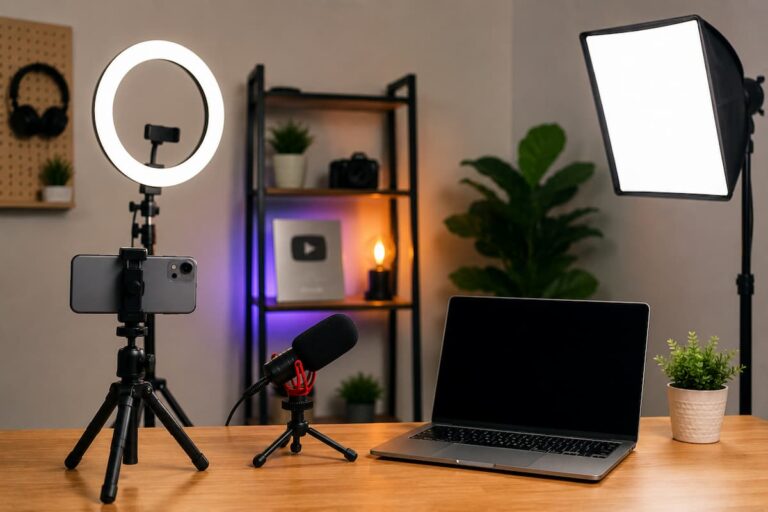
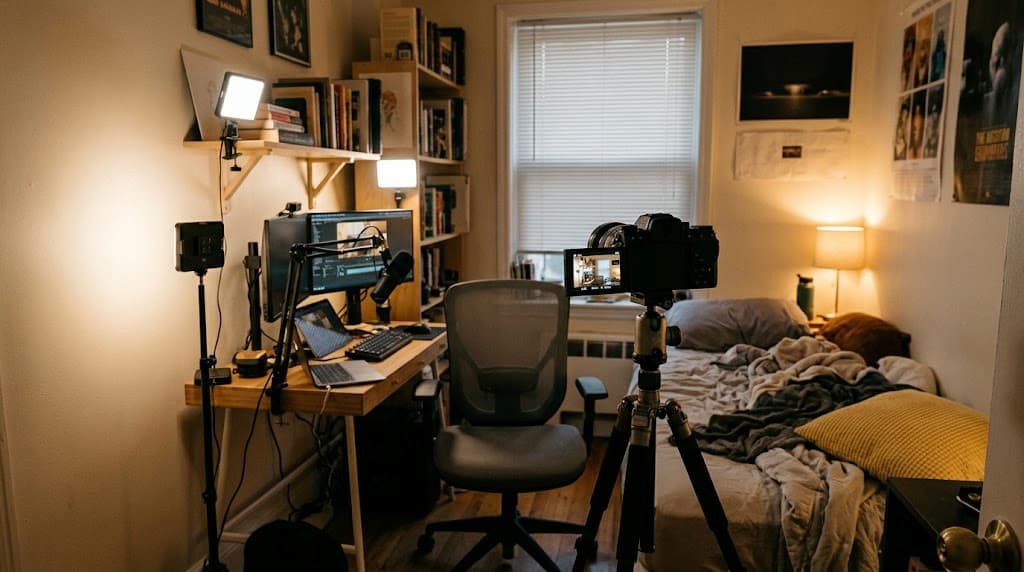
See how a desk with a wall-bouncing setup looks below: See the wall-bouncing setup below: Here is the rest of the visual breakdown of the setup:

How the Bounce Technique Works: Instead of pointing a light directly at your face with a massive softbox attached to it, you take a bare, powerful LED light (like an Aputure Amaran 60d or a small Godox fixture) and point it backward, directly at the wall immediately behind your computer monitors.
When the harsh, focused light hits a white or light-grey wall, it scatters in every direction. The wall essentially becomes a massive diffusion layer. The light bounces off the drywall and wraps incredibly softly around your face. Because the wall is much larger than any softbox you could reasonably buy, the light it produces is exceptionally soft and flattering.
Why this is perfect for tiny rooms:
-
Zero Footprint: You don’t need a softbox modifier at all. You just need the physical light fixture, which is often only a few inches wide and barely gets hot.
-
Mounting Flexibility: Because the bare light fixture is lightweight and doesn’t have a giant sail of fabric catching the air, you don’t need a massive floor stand. You can mount the light directly to the back of your desk using a simple C-clamp pole (like an Elgato Master Mount or a basic camera desk clamp).
-
Eliminates Glasses Glare: If you wear glasses, pointing a softbox at your face usually results in two massive, distracting white squares reflecting in your lenses. Bouncing the light off a wall spreads the source out so widely that the reflection becomes a soft, imperceptible gradient.
Crucial Warning: This technique only works if your room’s walls are painted white, light grey, or a very pale off-white. If you bounce a daylight-balanced light off a bright red wall, the light will absorb that red pigment, bounce it back onto your face, and you will look like you have a severe sunburn on camera.
Solution 2: Edge-Lit LED Panels (The Low-Heat Alternative)
If your room is painted a dark color, or your desk is floating in the middle of a room away from any walls, you cannot rely on the bounce technique. You have no choice but to point a light directly at your face. In a tiny room, you still cannot use a massive parabolic softbox. You need a dedicated Edge-Lit LED panel.
Traditional, cheap LED panels—the ones where you can clearly see hundreds of individual, exposed yellow diodes staring back at you—are incredibly harsh on the human eye. If you point one of those directly at your face, you will be squinting through your entire stream, and the shadows on the wall behind you will be sharp and distracting.
Edge-Lit panels—such as the Elgato Key Light, the Logitech Litra Glow, or the Razer Key Light Chroma—are engineered entirely differently. The actual LED bulbs are hidden away around the inside frame of the housing, firing inward into a built-in frosted diffusion plate, rather than firing forward at your retinas.
See a close-up of an Edge-Lit panel: Let’s review the detail on that edge-lit panel setup:

The Creator Advantages of Edge-Lit Panels:
-
Insanely Thin Profile: An Elgato Key Light is roughly one inch thick. It takes up virtually zero physical volume in the room. You can push your desk completely flush against a wall and still have room for the light to hover over your monitors.
-
Zero Heat Output: Because the LEDs are spaced out around the edge of the frame rather than clustered in a dense center array, and because they are explicitly designed for up-close desk use, they run incredibly cool. You can sit two feet away from an edge-lit panel for an 8-hour marathon broadcast without breaking a single drop of sweat.
-
Integrated Desk Mounting: Almost all premium edge-lit panels are designed from the ground up to clamp directly to the back lip of your desk. This frees up 100% of the floor space that traditional tripod legs would normally consume, allowing you to actually roll your chair around your tiny room.
If you are building a streaming setup in a 10×10 room or smaller, clamping two edge-lit panels to the back left and back right of your desk is the most space-efficient, heat-conscious setup money can buy.
Solution 3: Practical Lighting for Background Depth
Once you have your face properly lit (which is called your “Key Light”), the biggest mistake creators make in a small room is letting the background immediately behind them fall into complete, muddy darkness.
If you are sitting just three feet away from your bedroom wall, and your main desk light is heavily focused only on your face, the wall behind you will look like a dark, uninviting cave. A poorly lit background flattens the image. It makes the room look even smaller, more cramped, and more claustrophobic than it actually is.
To fix this visual flattening, you need to separate yourself from the wall using “Practical Lights.“
See how to bring warmth and depth into your backgrounds below: See this atmospheric result in the room:
A practical light is quite simply any light source that is visibly turned on inside the camera’s frame. You do not need to buy expensive, professional studio gear for this layer of your lighting design. You can achieve massive depth with cheap, consumer-grade items:
-
A $15 RGB light strip run along the back edge of your desk, firing upward to “wash” the wall in color.
-
A small, stylish desk lamp with a warm, dimmable Edison-style bulb sitting on a bookshelf behind you.
-
An LED tube light (like a Nanlite Pavotube or an inexpensive Amazon equivalent) standing upright in a dark corner.
By throwing a splash of contrasting color—usually a cool teal, a deep purple, or a warm orange—onto the wall immediately behind you, you create visual “depth.” The camera sensor separates your well-lit face in the foreground from the colorful glow in the background, effectively tricking the viewer’s eye into thinking the physical room is much deeper and more spacious than the tape measure says it is.
Advanced Space Control: The Power of Negative Fill
In a very small room with white walls, you might run into the opposite problem: there is too much light bouncing around. The light from your monitors, your key light, and your ceiling bounces off the white walls and fills in every shadow on your face. While this is a very clean look, it can wash you out and make your face look wide and flat.
Professional cinematographers introduce contrast by using “Negative Fill.” This means actively blocking light from hitting one side of your face.
In a tiny bedroom, you don’t need giant professional flags to achieve this. You can hang a dark grey or black acoustic sound blanket on the wall just out of frame on one side of your setup. Not only will the heavy blanket absorb the harsh, echoing reverb of your voice in the small room (drastically improving your microphone audio), but the black fabric will absorb the stray light. This creates a subtle, flattering shadow on one side of your jawline, giving your video a highly dramatic, professional edge without requiring a single extra piece of bulky lighting equipment.
The Step-by-Step Tiny Room Blueprint
If you are completely overhauling a small bedroom today, here is the exact order of operations you should follow to build your lighting without wasting space or money:
-
Turn off the ceiling light immediately. The overhead dome light in your bedroom casts horrible, downward shadows under your eyes and nose (often called “raccoon eyes”). Never use it while filming.
-
Control your natural window light. If you have a window, you cannot let the sun dictate your exposure. Buy heavy blackout curtains. If you rely on window light, the sun will simply hide behind a cloud in the middle of your video, your camera exposure will plunge, and your editing process will become an absolute nightmare.
-
Establish your Key Light (Desk-Mounted). Buy a single, high-quality Edge-Lit panel (or a bare light if you plan to bounce it off the white wall). Mount it securely to your desk via a metal C-clamp, position it slightly above your eye level, and angle it down at a 45-degree angle.
-
Add the Background Splash. Place one small, inexpensive RGB light or a warm lamp in the background to create depth and separate your chair from the wall.
You do not need a commercial warehouse studio or massive Hollywood softboxes to look professional. By fiercely managing your physical floor space with desk clamps, utilizing wall bounces to soften harsh diodes, and choosing modern, low-heat LED technology, you can create a beautiful, cinematic image in the absolute tightest of spaces.
We successfully generated the image assets first so you can clearly check them visually as we went. Let me know if you would like to move directly onto the next draft or have another adjust.

Riley Bennett writes about content creation, streaming gear, and building efficient creator workflows at estergamer.com. After spending years testing equipment and figuring out what actually works versus what just looks impressive, Riley focuses on practical, no-nonsense advice for beginners starting from scratch. When not writing, Riley enjoys exploring new tech, refining home studio setups, and helping fellow creators skip the expensive mistakes that slow most people down. The goal is simple: honest guidance that gets real results without the marketing fluff.