When I started my podcast three years ago, I made the same mistake most beginners do — I used the built-in microphone on my laptop. The result? My voice sounded like I was recording from inside a tin can, and background noise made every episode a struggle to edit. It took me weeks to realize that the single biggest upgrade I could make wasn’t better software or a fancier camera—it was a decent microphone.
If you’re reading this, you’re probably in a similar spot. Maybe you’re starting a YouTube channel, launching a podcast, or just want your Zoom calls to sound less like you’re underwater. The good news? You don’t need to spend a fortune to get professional-sounding audio. In this guide, I’ll walk you through everything you need to know about beginner-friendly microphones, from the basics of how they work to what features you should look for when shopping.
Why Audio Quality Matters More Than You Think
Here’s something I learned the hard way: viewers and listeners will tolerate mediocre video, but they won’t stick around for bad audio. Studies consistently show that poor sound quality is the number one reason people stop watching videos or abandon podcasts. Think about it—when someone’s voice is crackling, muffled, or drowned out by echo, your brain works overtime just to understand what’s being said. It’s exhausting.
On the flip side, crisp, clear audio creates an instant sense of professionalism. It makes your content feel polished and trustworthy. I’ve had listeners tell me they subscribed to my podcast specifically because “it just sounds good.” That one compliment made the modest amount I spent on my first real microphone feel like the best investment I’d ever made.
Understanding Microphone Types: The Basics
Before you start shopping, it helps to understand the two main types of microphones you’ll encounter as a beginner. Don’t worry — this isn’t going to get overly technical. Think of it like learning the difference between automatic and manual transmission before buying a car. You don’t need to be an engineer, but knowing the basics saves you from buying the wrong thing.
Dynamic Microphones
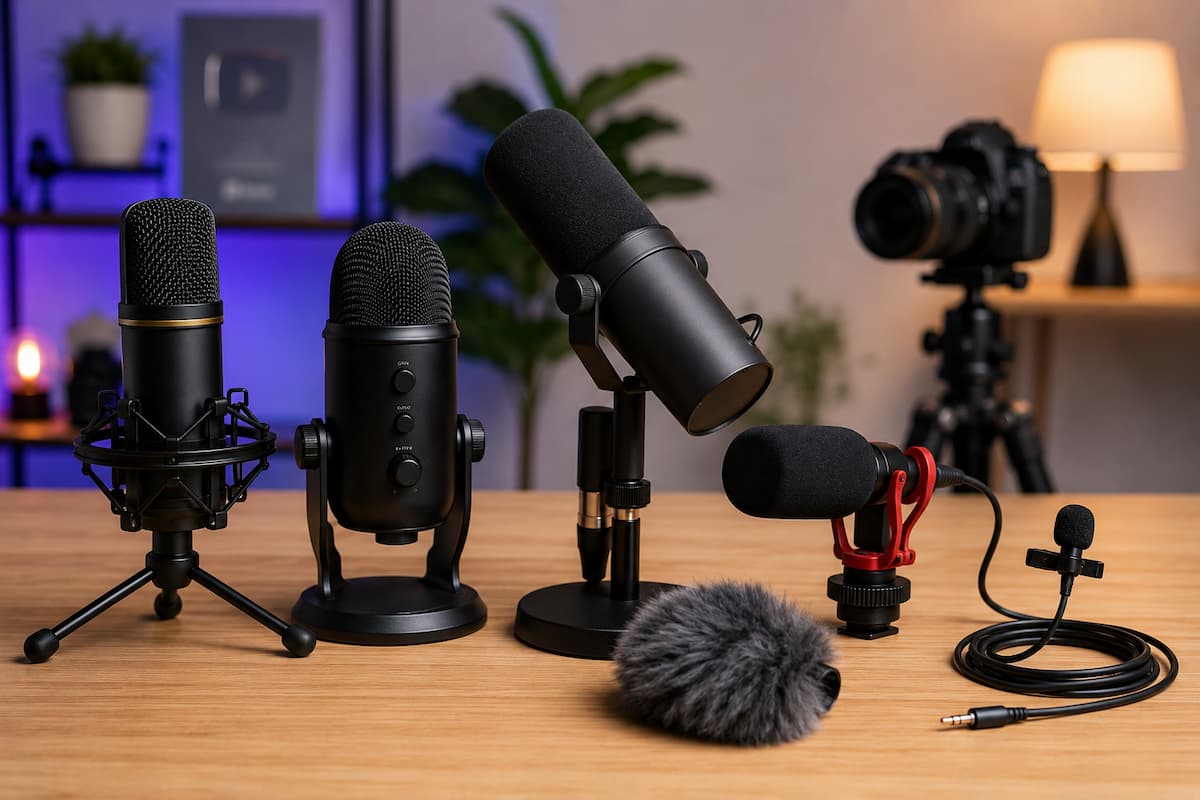
Dynamic microphones are the workhorses of the audio world. They’re built to last, don’t require external power, and are excellent at rejecting background noise. If you’re recording in a room that isn’t perfectly soundproofed — which describes 99% of home setups — a dynamic mic is often your best friend.
I still use a dynamic microphone for my live streams because my office has a window facing a busy street. The mic picks up my voice beautifully while ignoring the traffic noise outside. It’s like having a built-in noise filter.
Condenser Microphones
Condenser microphones are more sensitive and capture a wider range of frequencies, which means they pick up more detail in your voice. The trade-off? They also pick up more of everything else—keyboard clicks, air conditioning hum, and the neighbor’s dog. They typically require phantom power (usually supplied by an audio interface or mixer), though many USB condenser mics handle this internally.
If you have a quiet, treated recording space, a condenser mic will make your voice sound rich and full. I switched to a condenser for my studio-recorded podcast episodes, and the difference in warmth and clarity was immediately noticeable.
| Feature | Dynamic Microphone | Condenser Microphone |
|---|---|---|
| Background Noise Rejection | Excellent | Poor to Moderate |
| Voice Detail & Warmth | Good | Excellent |
| Power Requirement | None | Phantom Power (48V) or USB |
| Best For | Noisy rooms, live streaming, gaming | Treated rooms, vocals, music |
| Typical Price Range | $50 – $150 | $60 – $200 |
USB vs. XLR: Which Connection Should You Choose?
This is where a lot of beginners get stuck. USB microphones plug directly into your computer—simple, no fuss. XLR microphones use a three-pronged connector and require an audio interface or mixer to work with your computer. So which should you pick?
Here’s my practical advice: if you’re just starting and want to test the waters, go USB. You can be recording within minutes of unboxing. I spent my first six months with a USB mic, and it was the perfect way to learn the ropes without getting overwhelmed by extra gear.
However, if you’re serious about content creation and can see yourself doing this for the long haul, XLR is worth considering. It gives you more control over your sound, allows you to upgrade individual components over time, and is the standard in professional broadcasting. When I eventually made the switch, I noticed finer control over my audio levels and the ability to use multiple microphones for interviews.
What to Look for When Buying Your First Microphone
Walking into a store or browsing online, the sheer number of options can feel overwhelming. Here’s a practical checklist of what actually matters when you’re shopping for your first microphone:
1. Pickup Pattern
The pickup pattern determines which directions the microphone captures sound from. For most beginners, a cardioid pattern is ideal — it captures sound primarily from the front while rejecting noise from the sides and rear. This is perfect for solo recording. Some microphones offer multiple patterns (cardioid, omnidirectional, bidirectional, stereo), which can be useful if you plan to record interviews or group discussions. I started with a cardioid-only mic and only later appreciated having multiple options.
2. Frequency Response
Frequency response refers to the range of sound frequencies a microphone can capture, measured in Hertz (Hz). For spoken word, you want a mic that covers roughly 80 Hz to 15 kHz. The human voice typically falls between 85 Hz and 255 Hz for fundamental tones, with harmonics extending higher. A microphone with a tailored frequency response for vocals will emphasize the frequencies that make speech clear and natural.
3. Build Quality
Your first microphone will likely get knocked around, travel with you, and survive a few accidental drops. Look for metal construction rather than all-plastic bodies. A solid metal chassis not only lasts longer but also helps reduce handling noise. I once dropped my metal-bodied microphone from desk height, and it kept working perfectly. A plastic one probably wouldn’t have survived.
4. Built-in Monitoring
A headphone jack on the microphone itself lets you hear exactly what the mic is picking up in real time, with zero latency. This might sound like a small feature, but it’s incredibly useful. Without it, you’ll hear your voice delayed through your computer, which creates a distracting echo effect. When I upgraded to a mic with built-in monitoring, my recording sessions became much more comfortable because I could hear myself naturally.
5. Gain Control
Gain control lets you adjust how sensitive the microphone is. Too much gain, and your audio distorts. Too little, and your voice sounds distant and thin. A physical gain dial on the microphone is more convenient than adjusting levels in software. Look for a mic that offers easy access to gain control, ideally with visual indicators or a smooth dial.
6. Price-to-Performance Ratio
The microphone market has a sweet spot between $70 and $150, where you get better sound than ultra-budget options, dramatically without paying for professional features you won’t use. Below $50, you often sacrifice build quality and sound clarity. Above $200, you’re paying for features that benefit experienced engineers more than beginners. My advice? Set your budget in that $70-$150 range and focus on finding the best fit for your specific needs.
| Feature to Consider | Why It Matters | What to Look For |
|---|---|---|
| Pickup Pattern | Controls what noise gets recorded | Cardioid for solo; multi-pattern for flexibility |
| Frequency Response | Affects how natural your voice sounds | 80 Hz – 15 kHz range for speech |
| Build Quality | Determines longevity and reliability | Metal body, solid connectors |
| Built-in Monitoring | Lets you hear yourself without delay | 3.5mm headphone jack on the mic |
| Gain Control | Prevents distortion and weak audio | Physical dial with smooth adjustment |
| Connection Type | Affects setup complexity and flexibility | USB for simplicity; USB+XLR for growth |
Essential Accessories That Make a Real Difference
A microphone alone won’t give you perfect audio. Over the years, I’ve learned that a few affordable accessories can dramatically improve your recordings. Here are the ones I consider essential:
1. A Microphone Stand or Boom Arm
Your microphone should be positioned 6-12 inches from your mouth, slightly off to the side to avoid breathing directly into it. A desk stand works fine, but a boom arm (a scissor-style arm that clamps to your desk) gives you much more flexibility and reduces desk vibrations. I use a simple desk stand that costs around $25, and it’s held up perfectly for two years. Boom arms typically run $40-$100 but are worth it if you have the budget.
2. A Pop Filter
Plosive sounds — those hard “p” and “b” bursts — can ruin an otherwise perfect recording. A pop filter is a thin mesh screen that sits between you and the microphone, diffusing those air blasts. Most cost $10-15, and they’re non-negotiable if you’re recording speech. I learned this the hard way after spending an entire afternoon re-recording a script because I didn’t have one. Some microphones come with a foam windscreen included, which helps, but isn’t as effective as a proper pop filter.
3. Shock Mount
A shock mount suspends your microphone in an elastic cradle, isolating it from vibrations. If you type while recording, bump your desk, or have a mechanical keyboard, a shock mount is invaluable. Some microphones come with one included; others require a separate purchase. Check before you buy, and if your mic doesn’t include one, budget an extra $20-$40 for a compatible shock mount.
4. Acoustic Treatment (Even on a Budget)
You don’t need to cover your walls in expensive foam panels. I’ve recorded perfectly usable audio in a closet full of clothes (the fabric acts as natural sound absorption). If you want a more permanent solution, a few strategically placed acoustic foam panels behind your mic can reduce echo significantly. Even hanging a thick blanket on the wall behind you helps more than you’d expect. A pack of 12 acoustic foam panels typically costs $20-$30 and covers enough area for a beginner setup.
Common Beginner Mistakes (And How to Avoid Them)
I’ve made every mistake on this list, so consider this section my attempt to save you from the same headaches:
- Speaking too far from the microphone: The “sweet spot” is usually 6-12 inches away. Too far, and you lose warmth and pick up room noise. Too close, and you get distortion and excessive bass. I use the “thumb-to-pinkie” hand measurement as a quick guide. Position the mic slightly off-center from your mouth to avoid breathing directly into it.
- Ignoring room acoustics: No microphone can fix a room that sounds like an empty swimming pool. Before blaming your mic, clap your hands and listen for an echo. If you hear it, your room needs treatment first. I’ve seen people return perfectly good microphones because they didn’t realize their empty office was the real problem.
- Cranking the gain too high: Higher gain doesn’t mean better audio — it means more noise and distortion. Set your input levels so your voice peaks around 12dB to -6dB. Most recording software shows this visually with a level meter. If the meter hits red, your gain is too high.
- Recording in the wrong pickup pattern: If your mic has multiple patterns (like some multi-pattern condensers), make sure you’re using cardioid for solo recording. I’ve accidentally left mine on omnidirectional and wondered why my keyboard clicks were so loud. Check your settings before every session.
- Neglecting post-processing: Even a great recording benefits from light editing. A noise gate (which silences audio below a certain volume), some light compression, and a high-pass filter can transform raw audio into something polished. I use free software like Audacity or Ocenaudio for basic cleanup. You don’t need expensive software to sound professional.
- Buying based on looks alone: Some microphones look incredible on camera but sound mediocre. Others are plain-looking but deliver exceptional audio. Read reviews that focus on sound quality, not just aesthetics. I almost bought a visually striking mic that turned out to have poor noise rejection in real-world testing.
Setting Up Your Microphone: A Step-by-Step Guide
When your microphone arrives, here’s exactly what to do to get the best possible sound:
- Choose your location wisely: Pick the quietest spot in your home, preferably away from windows, air vents, and appliances. My closet-turned-studio is the most humid room in my house, but it’s also the quietest, so I deal with it. Avoid rooms with hard floors and bare walls if possible.
- Mount the microphone: Attach it to your stand or boom arm, ensuring it’s stable and won’t wobble during recording. Position it at mouth level or slightly above — never below, or you’ll sound nasally. The mic should point toward your mouth, not up at your chin.
- Attach the pop filter: Place it 2-4 inches in front of the microphone. You should be able to see the mic through the mesh, but your breath shouldn’t hit the capsule directly. The pop filter should be between you and the microphone, not behind it.
- Connect to your computer: For USB mics, plug directly into a USB port (avoid USB hubs if possible, as they can cause interference and power issues). For XLR mics, connect to your audio interface first, then the interface to your computer. Use the shortest cable length that works for your setup.
- Test your levels: Open your recording software and speak at your normal volume. Adjust the input gain so your voice peaks in the green-to-yellow zone, never hitting the red. Do a 30-second test recording and listen back with headphones. Pay attention to background noise, echo, and clarity.
- Listen for problems: Check for background noise, echo, distortion, or plosives. If you hear issues, adjust your position, gain, or room setup before starting your actual recording. It’s much easier to fix problems now than to try fixing them in post-production.
Final Thoughts: Start Simple, Upgrade Smart
Three years into my content creation journey, I’ve learned that gear is important, but it’s not everything. The best microphone is the one that gets you recording consistently. Don’t let analysis paralysis stop you from creating. Buy a solid beginner mic, learn to use it well, and start publishing. You can always upgrade later.
My advice for most beginners is to start with a dynamic microphone if you’re in a typical home environment or a condenser if you have a quiet, treated space. Look for USB connectivity to keep things simple, and prioritize features like built-in monitoring and gain control. If you can find a model with both USB and XLR connections, you’ll have room to grow without replacing your entire setup.
Remember: every successful creator you admire started with basic equipment. What set them apart wasn’t their gear — it was their consistency, their willingness to learn, and their decision to start before they felt “ready.” Your microphone is just a tool. Your voice, your ideas, and your dedication are what truly matter. Now go record something great.
Quick Summary: Key Takeaways
- Audio quality matters more than video quality for audience retention
- Dynamic microphones are best for noisy rooms; condensers excel in quiet, treated spaces
- USB mics are perfect for beginners; XLR offers more flexibility for serious creators
- Look for cardioid pickup pattern, built-in monitoring, and gain control when shopping
- The $70-$150 price range offers the best value for beginners
- Essential accessories: stand, pop filter, and basic acoustic treatment
- Room acoustics matter as much as your microphone choice
- Start recording now — upgrade your gear as you grow, not before

Riley Bennett writes about content creation, streaming gear, and building efficient creator workflows at estergamer.com. After spending years testing equipment and figuring out what actually works versus what just looks impressive, Riley focuses on practical, no-nonsense advice for beginners starting from scratch. When not writing, Riley enjoys exploring new tech, refining home studio setups, and helping fellow creators skip the expensive mistakes that slow most people down. The goal is simple: honest guidance that gets real results without the marketing fluff.