Every streamer eventually hits the exact same audio wall. You start your broadcasting journey with a basic USB microphone—maybe a Blue Yeti, a HyperX QuadCast, or an entry-level Razer Seiren. For the first few months, it sounds perfectly fine. You adjust your OBS filters, apply a basic noise gate, and your stream sounds acceptable.
But then, you drop into a larger creator’s broadcast. You hear that crisp, radio-broadcast warmth. You notice the complete lack of background keyboard clacking, the zero-latency monitoring, and the way their voice cuts through heavy game audio without distorting. Suddenly, your USB microphone sounds thin, tinny, and undeniably amateur. That is usually the exact moment you decide it’s time to upgrade to a professional XLR setup.
I made this exact jump three years ago. I moved from a standard Elgato Wave:3 to the industry-standard Shure SM7B, paired with a GoXLR mixer. What the tech reviewers on YouTube didn’t tell me was that buying the XLR microphone is just the first—and often the cheapest—part of the upgrade process. Transitioning from USB to XLR completely changes your technical workflow, demands significant desk space, and introduces hidden costs that can easily double your initial budget.
If you are thinking about overhauling your stream’s audio in 2026, here is exactly what happens to your workflow, your workspace, and your wallet when you make the jump.
The USB Reality: Convenience at the Cost of Control
To understand why an upgrade might be necessary, you first need to understand how your current hardware actually works. USB microphones are heavily marketed toward streamers for one massive reason: simplicity.
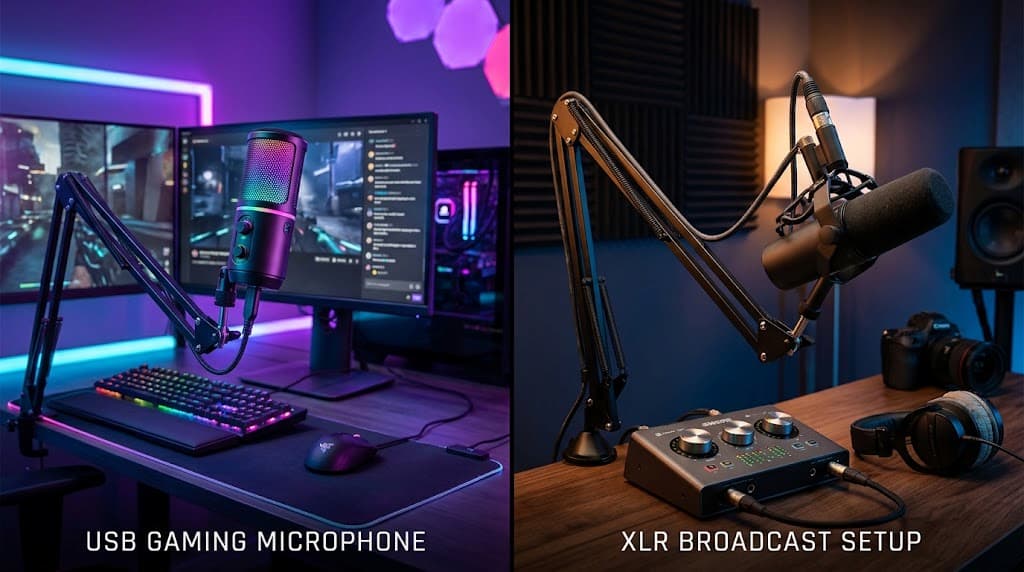
A USB microphone has a built-in analog-to-digital converter (ADC) and a miniature preamplifier housed entirely inside the microphone’s chassis. The capsule of the microphone captures the analog sound waves from your voice, and the internal hardware immediately translates those waves into digital data (ones and zeros) that your computer’s motherboard can understand.
The major advantage of this is plug-and-play operation. You connect a single USB-C cable to your PC, open OBS Studio, select your microphone from the dropdown menu, and you are live. For many creators, especially those just starting out, this frictionless experience is invaluable. You don’t need a degree in audio engineering to sound decent.
However, the major drawback reveals itself when you try to route your audio. Let’s say you want to separate your Spotify music from your game audio so your Twitch VODs don’t get muted for copyright strikes. Because your USB mic is just sending a single digital signal to your PC, it cannot help you separate other audio sources physically. You are forced to rely on software routing solutions—like Voicemeeter Banana, virtual audio cables, or proprietary software like Elgato’s Wave Link.
While software routing has improved dramatically over the years, it is still software. It is prone to crashing mid-stream. It introduces microscopic amounts of latency (delay) that can ruin rhythm games or competitive shooters. And worse, a simple Windows update can completely reset your virtual audio cables, leaving your stream completely silent while you panic-troubleshoot live in front of your viewers.
The XLR Ecosystem: Modular, Professional, and Analog
When you switch to an XLR microphone, you are stripping the digital conversion hardware out of the microphone itself. An XLR microphone (whether it is a dynamic mic or a condenser mic) is a purely analog device. It captures the sound of your voice and sends a continuous, low-voltage analog electrical signal down a cable.
Because your modern gaming PC only speaks digital, you cannot plug an XLR cable directly into your motherboard. To get that analog signal into your computer, you must introduce a middleman: an Audio Interface or an Audio Mixer.
This modular separation is what makes XLR systems both incredibly powerful and notoriously complex. You are no longer just buying a microphone; you are building a custom audio chain.
The Power of Physical Hardware Control
The massive benefit of moving to an interface or a hardware mixer (like the RodeCaster Duo or the GoXLR) is tactile, physical control.
When you use a hardware mixer, you route your PC’s game audio, your Discord voice chat, and your music into separate physical channels on the device. Want to mute your mic to cough? Press a hard button. Want to turn down your screaming teammates in Discord but keep your own voice loud for the stream? Slide a physical fader down. You no longer have to Alt-Tab out of your fullscreen game to frantically click around in OBS settings. The peace of mind this brings during a chaotic live broadcast cannot be overstated.
The Hidden Hardware Costs of XLR
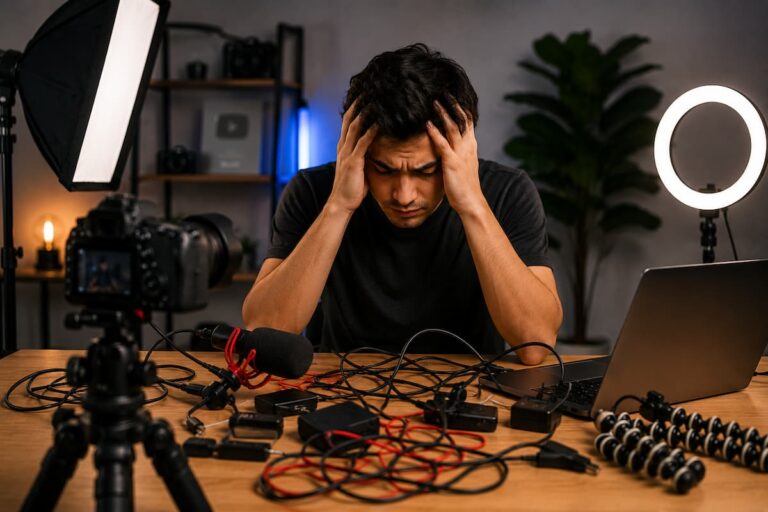
This is where the true cost of upgrading catches new creators off guard. When you buy a USB mic, you get everything you need in the box. When you buy a high-end XLR mic, you are usually just buying a piece of metal in a cardboard box. You have to purchase the rest of the ecosystem piecemeal.
1. The Audio Interface ($150 – $500+)
As mentioned, you need a device to convert the signal. Entry-level interfaces like the Focusrite Scarlett 2i2 or the Elgato Wave XLR cost around $150 to $200. If you want a full broadcasting mixer with physical faders and voice-changing effects, you will be spending anywhere from $400 to $600. Furthermore, these devices take up significant physical space on your desk and require their own power and USB routing.
2. The Gain Problem and Preamps (The $150 Surprise)
If you are upgrading to XLR, you are likely buying a dynamic broadcast microphone like the Shure SM7B, the Electro-Voice RE20, or the Rode Procaster. These microphones are notoriously “gain hungry.” This means their natural output signal is incredibly quiet.
Most entry-level audio interfaces under $200 do not have enough internal power (gain) to make these microphones loud enough for a Twitch stream. If you just turn the gain dial all the way up on a cheap interface, it introduces a massive amount of static “hiss” (the noise floor) into your audio.
To fix this, streamers historically had to buy an inline active preamp—most commonly the Cloudlifter CL-1 or a FetHead. That is an extra $150 piece of metal whose sole job is to provide clean gain to make your expensive microphone loud enough to use. (Note: In recent years, companies have started addressing this. The newer Shure SM7dB model, for instance, has a built-in preamp to bypass the need for a Cloudlifter, but it costs significantly more upfront).
3. Boom Arms and Cabling ($100 – $150)
Unlike entry-level USB mics, professional XLR microphones do not come with cheap plastic desk stands. They are made of solid metal and are incredibly heavy.
If you try to mount a 2-pound broadcast mic on a $15 Amazon boom arm, the arm will immediately sag, droop, and hit your keyboard. You have to invest in a heavy-duty broadcast suspension boom arm (like the Rode PSA1+ or the Elgato Wave Mic Arm), which will cost you between $100 and $130.
Additionally, you have to buy your own XLR cables. While standard cables are relatively cheap ($20), premium shielded cables to prevent electronic interference from your gaming PC can cost upward of $50.
If reading that cost breakdown just gave you sticker shock, there is a modern middle ground that has exploded in popularity for creators: the Hybrid Microphone.
Microphones like the Shure MV7+ or the Rode PodMic USB feature dual outputs. They have both a standard USB-C port and an analog XLR port on the back.
This is brilliant for newer streamers because it completely eliminates the fear of “buying twice.” You can purchase the microphone today for around $250, plug it directly into your PC via USB, and enjoy the built-in digital signal processing (DSP) and auto-leveling software.
A year later, when your stream grows and you finally have the budget for a high-end GoXLR mixer or a RodeCaster, you don’t have to throw your microphone in the closet. You simply unplug the USB cable, plug in an XLR cable, and integrate it into your new professional hardware setup.
The Final Verdict: When Should You Actually Upgrade?
Ultimately, audio is highly subjective, but the return on investment diminishes rapidly the more money you spend. Moving from a $20 headset mic to a $100 USB mic is a 1000% improvement in quality. Moving from a $150 high-end USB mic to a $1,000 XLR ecosystem might only yield a 15% improvement in raw audio quality to the average viewer listening on cheap phone speakers.
Stay with a high-end USB microphone if: You are a solo streamer who just wants to chat with your audience, react to videos, and play games. Modern USB mics sound fantastic. If you spend your time optimizing your room acoustics (adding rugs, acoustic panels, and removing echo), your USB mic will sound better than an XLR mic in an empty, hardwood-floor room.
You should make the massive investment into an XLR ecosystem if:
-
You regularly host in-person podcasts or guests and need to plug multiple microphones into a single PC simultaneously.
-
You desperately need physical faders on your desk to mix game audio, Discord, and stream alerts independently without tabbing out of your game.
-
You are transitioning your content creation business from casual streaming into high-end professional voiceover work, paid sponsorships, or commercial video production.
Don’t upgrade just because your favorite top-tier Twitch streamer uses an SM7B. Upgrade because your current software workflow is physically preventing you from making the content you want to make.

Riley Bennett writes about content creation, streaming gear, and building efficient creator workflows at estergamer.com. After spending years testing equipment and figuring out what actually works versus what just looks impressive, Riley focuses on practical, no-nonsense advice for beginners starting from scratch. When not writing, Riley enjoys exploring new tech, refining home studio setups, and helping fellow creators skip the expensive mistakes that slow most people down. The goal is simple: honest guidance that gets real results without the marketing fluff.